control a sonoff switch from Home Assistant using IFTTT
The regular way to switch a Sonoff relay is to use the official ewelink app. Other ways require you to ‘flash’ the Sonoff device with Tasmota or ESPHome software and then control it with Home Assistant. Both approaches are useful.
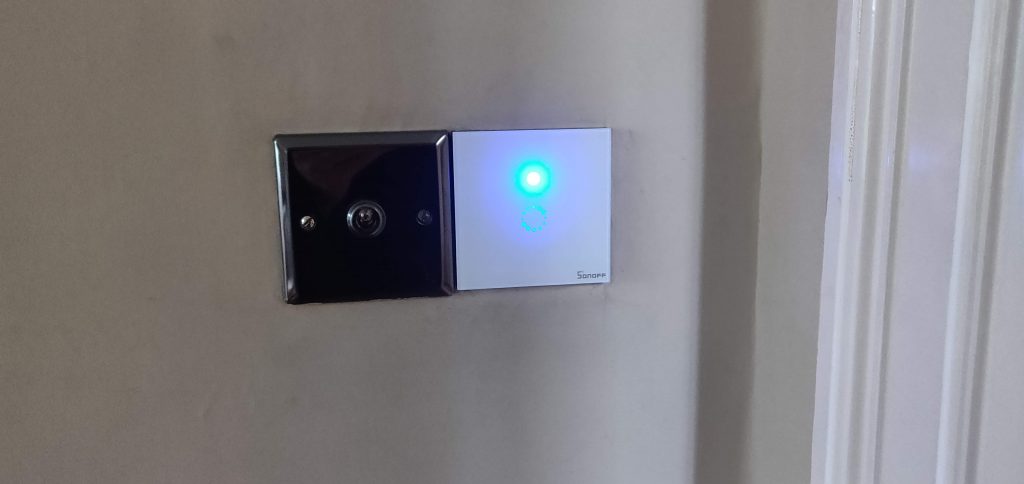
My need was to control the living room wall lights with a mains-wired Sonoff T4EU1C wall plate switch. The switch would be used in a routine where say, the wall lights turned on as the TV switched off. There are easier ways to do this, but none are as cheap as this £10 wall switch.
*The instructions below show how IFTTT, eWelink and Home Assistant can cooperate. However, in April 2020 I found a custom-component for Home Assistant which offers a much easier solution. See my control a sonoff switch from Home Assistant and eWelink
The project outline
I’m first going to set up two buttons in Home Assistant that will use IFTTT to turn the light on and off. Next I’ll write an automation routine to switch the light when the TV goes off. Finally I’m going to build on that so that I can switch the lights from a push button on the coffee table.
Why do many smart wall switch reviews on Amazon have one star reviews? Almost all wall switches lack a neutral wire back to the supply. The neutral wire is needed to power the smart electronics. Those reviewers have discovered that wiring some switches requires more work or a workaround. What they should be looking for is a ‘no neutral wire required‘ light switch like the Sonoff T4EU1C. The switch turns on and off. It’s not a dimmer. A dimmer is no good with many modern bulbs.
1. Install the Sonoff wall switch and pair it with the ewelink app
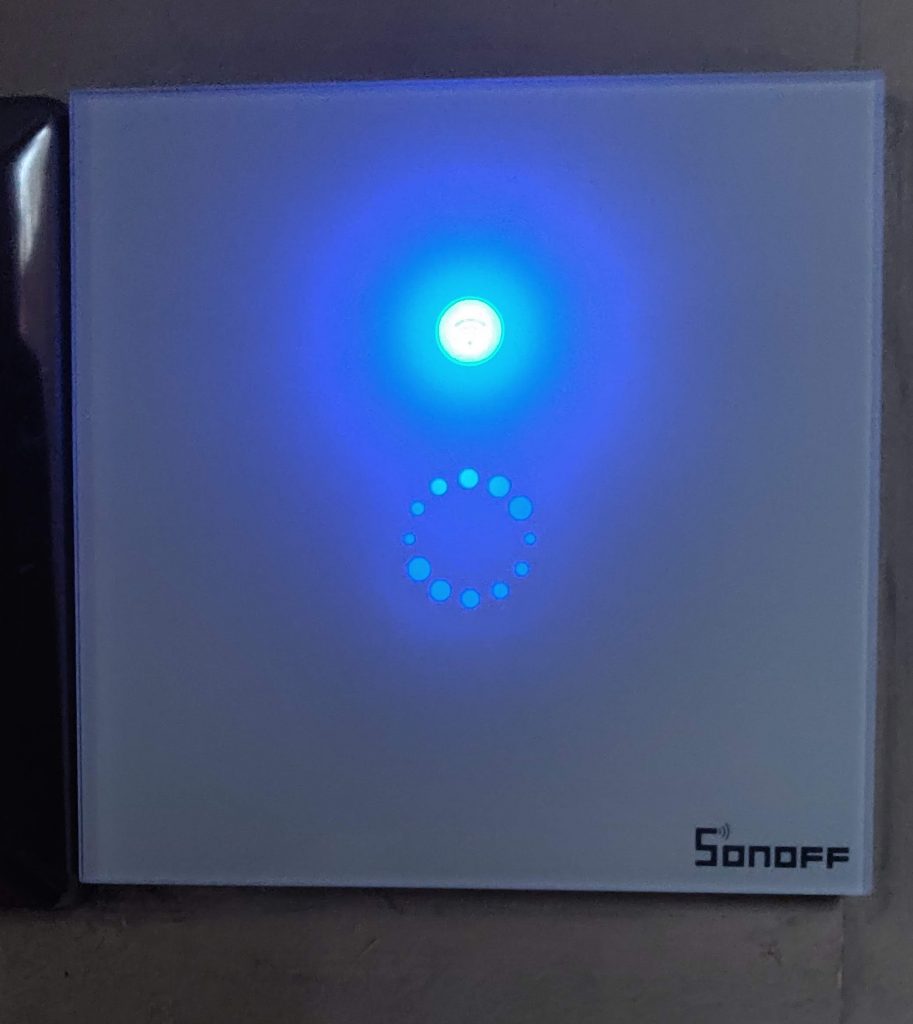
You’re dealing with mains electricity so you must disconnect the supply or consider your possible death. Check there’s no power using a meter – house circuits do sometimes interconnect. The T4EU1C easily fits a medium-depth back box and it uses the feed and load wires already in there. When that is fitted and closed up the wall light works like any touch switch. When you ‘press and hold’ the button you can pair it to the Sonoff ewelink app and your wifi.
2. Use IFTTT
Go to IFTTT, sign in and add the Webhooks service (and the ewelink service). See the official docs for Home Assistant IFTTT
3. Get your key from the Webhooks service
Go to IFTTT > My services > Webhooks > settings and copy the key from the webhooks URL.

# Add the key, the string of characters found in the URL, to your Home Assistant configuration.yaml

ifttt:
  key: 6XASTRINGOFCHARACTERS
# key: !secret iftttkey
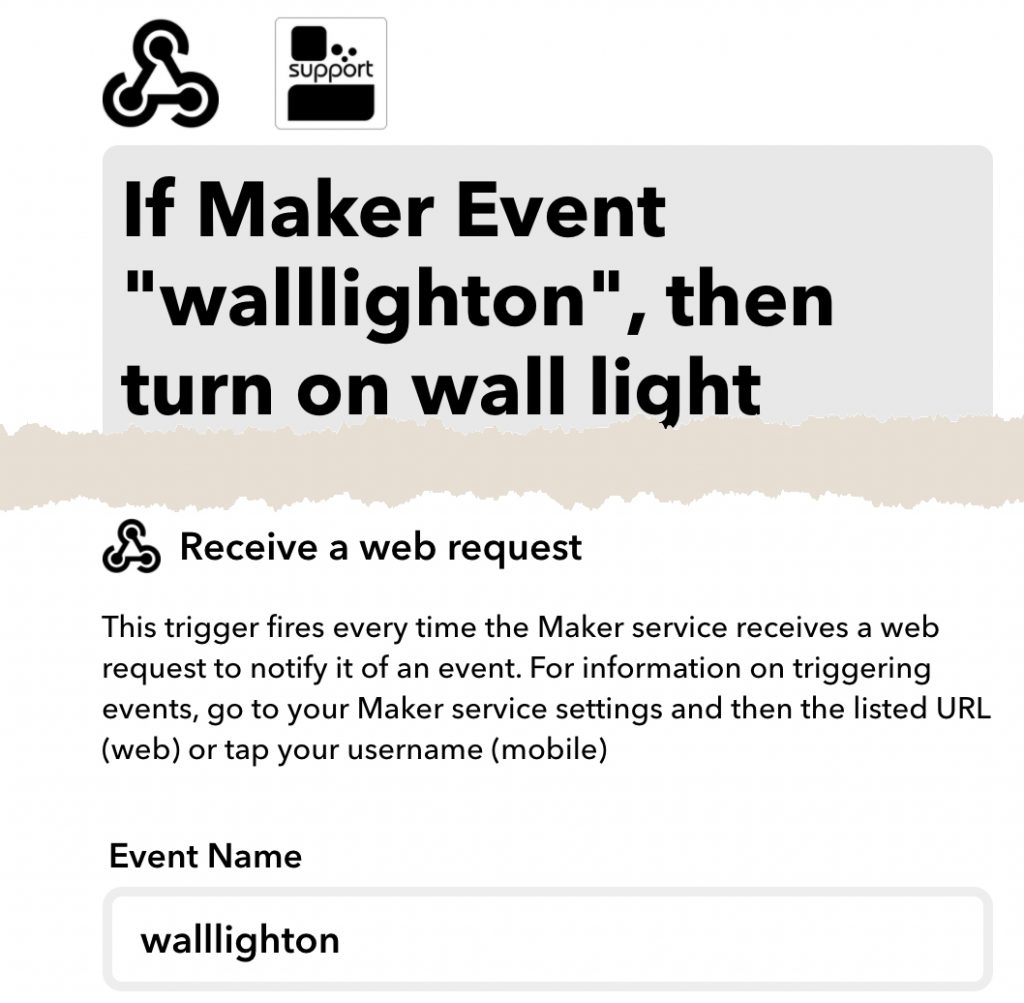
3: Create an IFTTT applet ‘IF Webhook THEN ewelink’
In the Webhook section of the IFTTT applet set a unique Event name, such as ‘walllighton’
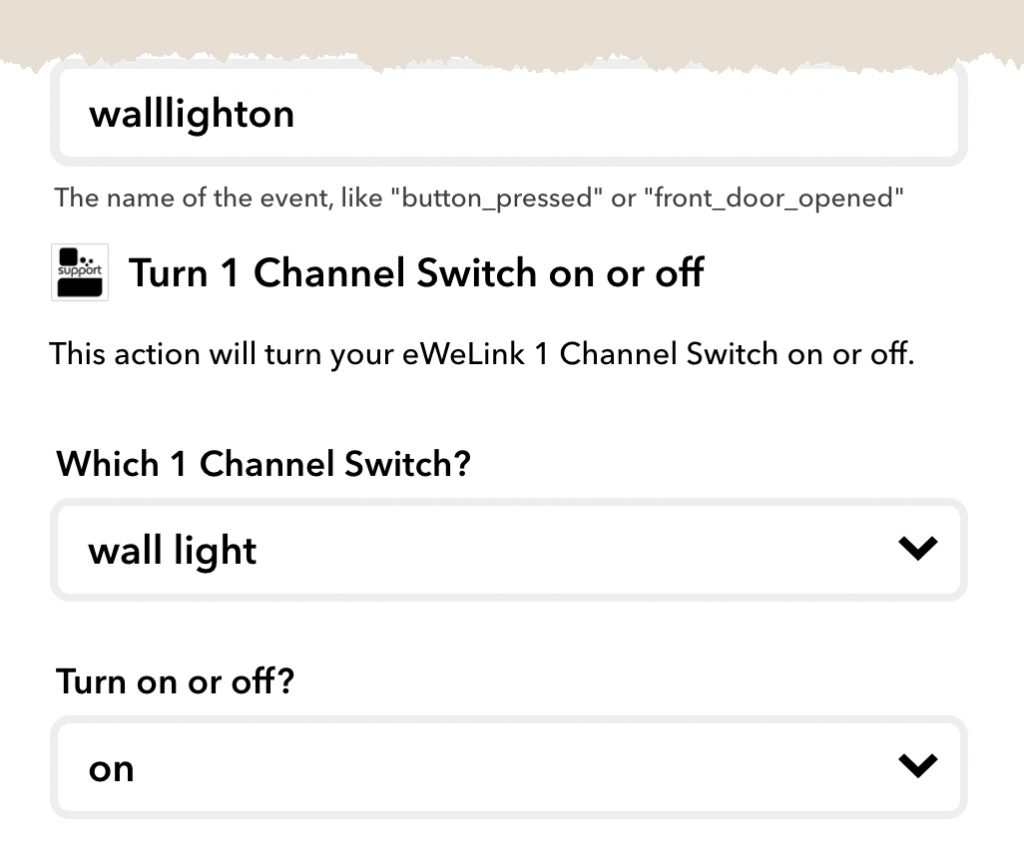
In the ewelink section of the IFTTT applet set the action you want, as shown below: ‘Channel switch on or off’ ‘wall light’ ‘on’. The name ‘wall light’ comes from the ewelink app. Lastly save the IFTTT applet. Hopefully you named the light correctly but if not go back to the ewelink app to rename it.
Now you’ve an applet capable of turning on the wall light. Nothing will physically happen until we do the next section. (Actually the Developer Section offers a way to send the event ‘walllighton’ to IFTTT).
Don’t forget that you must make another applet to turn off the light. It’s very similar of course.
4: Write scripts called ‘light on’ and ‘light off’
Go to the Scripts section in Home Assistant. We now create scripts to send a message to IFTTT. The script ‘walllighton‘ is very simple: it tells Home Assistant to send an event trigger to IFTTT named ‘walllighton’, which is exactly the same event name in the IFTTT applet. The second script below provides the turn off feature.
Why are we writing scripts and not automations? Well, I feel it’s easy to problem solve when you’ve broken the problem into separate routines that you can test.
THIS IS A SECTION FROM SCRIPTS.YAML CREATED BY THE SCRIPT EDITOR
'walllighton':
alias: walllighton
sequence:
data:
event: walllighton
service: ifttt.trigger
'walllightoff':
alias: walllightoff
sequence:
data:
event: walllightoff
service: ifttt.trigger
5. Add scripts to the Home Assistant frontend.
You can test your scripts in the Script editor under ‘Configuration’

To add a Script to Home Assistant for everyday use you need to find the Configure UI button in the frontend (It hides at the top right of the Lovelace window).
Add the script to an entity card or entity button. Here I used an entity card:

6. Write an automation routine so that the wall lights go on and off automatically
You create automation routines using a tool in the Configuration section. This tool needs its own instructions, however eventually it will have written some code for you and saved it in automations.yaml. I’ve put my code below. Although the bold items are unique to my setup, describing it may make it clear.
- The table lamp is normally on while watching TV. The TV remote turns off the table lamp when it turns off the TV. The table lamp event triggers the automation and turns the wall lights on.
- Additionally two conditions must be fulfilled: it must be evening and the TV must be off.
HOME ASSISTANT CREATES THIS ID FOR YOU. YOU CAN CHANGE IT TO WORDS
id: '15865602125'
alias: walllight courtesy
description: when table lights go off wall light goes on

trigger:
entity_id: light.table_lamp
from: 'on'
platform: state
to: 'off'

condition:
condition: state
entity_id: sensor.tv_activity
state: PowerOff
after: '20:00:00'
before: '03:00:00'
condition: time

action:
data: {}
service: script.walllighton
7. Set up a physical button on the coffee table to turn on the Sonoff T4EU1C

When the wireless black button is pressed a 433MHz signal goes to a Sonoff RF bridge. The bridge recognises the code and sends a MQTT message to Home Assistant. An automation routine in Home Assistant lies in wait for that message. The routine currently turns off the wall lights so that we can watch TV. The process is very similar to my smart letterbox.
You may notice that I’ve failed to find a way to toggle the state of the Sonoff T4EU1C with my black button. IFTTT will happily update the state of the light in Home Assistant, if I can find out where I store that information making it into a toggle is easy.
8. Create an input_boolean to store the switch state in Home Assistant
In your configuration.yaml add these lines
input_boolean:
  walllight:
    name: walllightstate
    icon: mdi:outdoor-lamp
9. Nothing worked hereon
9 In IFTTT create two applets that will change the state when ewelink detects a change of state:

# This failed to change the state of the input_boolean

id: '1587682947188'
alias: walllnowoff
description: set state of input boolean
trigger:
platform: webhook
webhook_id: ifttt_webhook_received
condition: []
action:
data: {}
entity_id: input_boolean.walllight
service: input_boolean.turn_on
# The body of the webhook was
{ "action": "call_service", "service": "input_boolean.turn_on", "entity_id": "input_boolean.walllight" }

# This failed to change the state of the input_boolean

automation:
- id: '11121221212'
  alias: walllight on state
  trigger:
  - event_data:
      action: call_service
    event_type: ifttt_webhook_received
    platform: event
  condition: []
  action:
  - data_template:
      entity_id: '{{ trigger.event.data.entity_id }}'
    service_template: '{{ trigger.event.data.service }}'