project: an immersion heater that turns itself when the water is hot – using a Sonoff POW relay.
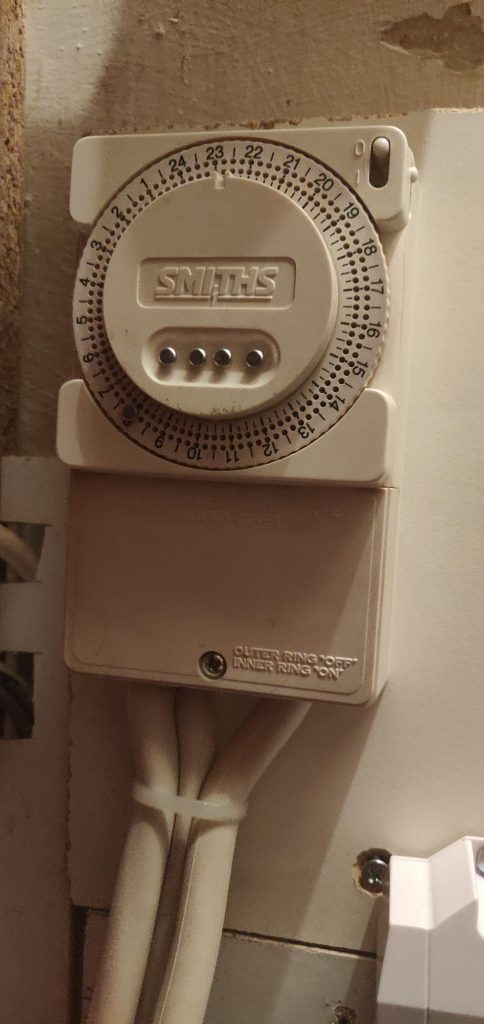
Domestic hot water can be heated by a gas or oil central heating boiler or by an electrical immersion heater. I take advantage of half-price nighttime electricity and use an immersion heater. In this house, after a night of heating the tank water is hot by morning and there’s enough hot water to last until the next morning. The heater had a mechanical timer which is a headache to use, adjust or even turn off. And then I needed to guess when I should set the turn on and turn off heating times.
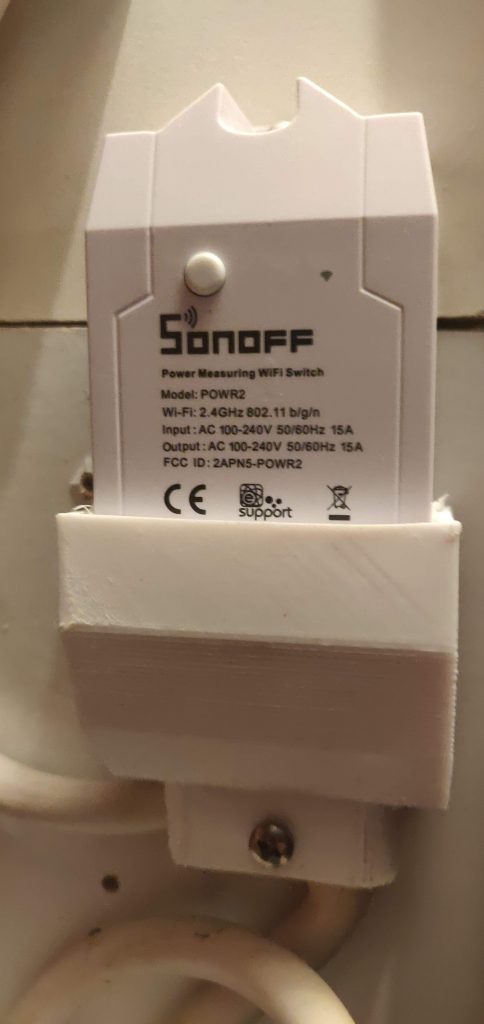
I was keen to know how best to use the water heater, so I bought a Sonoff POWR2 wifi relay. The Sonoff POWR2 (£10) can measure the electricity used, run a schedule and is easily and remotely adjusted using an app. Other brands of energy monitoring smart relays might be used (eg TP-link) but the Sonoff POWr2 is used in my project.

The original mechanical timer switch was retained by wiring this and the POWR2 in parallel. I made a protective cover for this POWR2 as it’s in a place where it gets knocked. The button here is my on/off override.
The Sonoff POWR2 normally connects to an app (ewelink). This app can set a schedule, however it doesn’t provide the history of the electricity used in between on times. Never mind, I have two ways to get this information into Home Assistant
- The method I used (in 2018) was to program that feature into the unit. I opened up the POW2 and following the procedure below, I flashed the POW2 with ESPhome firmware. When that’s done I could then view the history of my electricity use in Home Assistant, my home automation app. I could also control the POW2 using automation routines. That’s all explained below.
- The method I use today (in 2022) is much easier, and probably preferable because you don’t have to modify its internals. You can also use the ewelink app. AlexxIT has created a custom_component for Sonoff devices which you can install in Home Assistant. When that’s done the Sonoff POW2 will ‘tell’ Home Assistant its power usage and allow itself to be controlled by Home Assistant. If you don’t want to use AlexxIT’s excellent but unofficial integration use the procedure below. Otherwise see the setting up on another page. And then, when you’ve installed the AlexIT Sonoff integration, see how to set up the automation to program the heater on this next page.
You no longer need to re-program Sonoff wifi smart plugs to control them with Home Assistant. However the following procedure shows how to do that and gain full control of your POW2:
How to re-program a Sonoff wifi smart plug and control it with Home Assistant
The Sonoff smart plug contains an ESP8266 chip. Its firmware can be replaced with different firmware so that you can use it in Home Assistant. The result is a hike in capability and convenience – but the procedure appeared a bit scary first time I saw it:
Edit the code in ESPhome
What we’re trying to do is to add our own more useful code to an ESP8266 chip and thus replace the manufacturers code. In the ESPhome code below we add our wifi password and network settings. We can also add a reboot switch or wifi signal meter but below is all we need. I use this code a lot in my other ESPhome projects.
# Enter the name you want to use
substitutions:
   devicename: immersion_heater

 esphome:
   name: {devicename}
   platform: ESP8266
   board: esp01_1m

wifi:
   ssid: "YOUR_SSID"
   password: "YOUR WIFI PASSWORD"
   manual_ip:
     # Set this to the IP you want for the ESP
     static_ip: 192.168.1.11
     # Set this to the IP address of the router. Often ends with .1
     gateway: 192.168.1.1
     # The subnet of the network. 255.255.255.0 works for most home networks.
     subnet: 255.255.255.0

sensor:
  - platform: cse7766
 current:
   name: "water heater current"
   icon: "mdi:current-ac"
 voltage:
   name: "water heater voltage"
   icon: "mdi:power-socket-uk"
 power:
   name: "water heater power"
   id: my_power

  - platform: total_daily_energy
    name: "water heater energy today"
    power_id: my_power


# Enable a connection to the Home Assistant API
api:
  password: "YOUR Home ASSISTANT API password"
# OTA ENABLES over the air edits of this from now on
ota:
  password: ""

sensor:
  - platform: wifi_signal
    name: ${devicename} wifi signal
    update_interval: 600s

switch:
  - platform: gpio
    pin: GPIO12
    name: "power relay"
    id: power_relay
    inverted: true
    restore_mode: RESTORE_DEFAULT_OFF
  - platform: gpio
    pin: GPIO13
    name: "blue LED"
    id: blue_led
    inverted: true

binary_sensor:
  - platform: gpio
    pin:
      number: GPIO0
    mode: INPUT_PULLUP
    name: "power button" #button on Sonoff POW
    id: power_button
    on_press:
      - switch.toggle: power_relay

logger:
  baud_rate: 0
uart:
  rx_pin: RX
  baud_rate: 4800
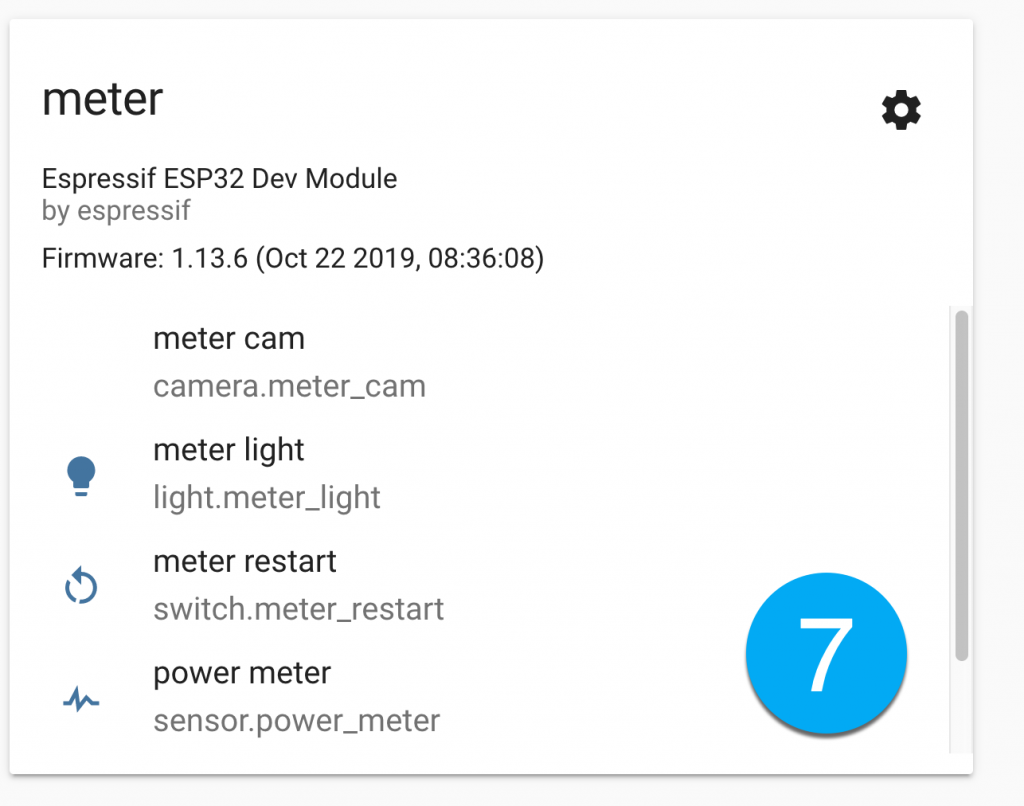
add the flashed POW2 to Home Assistant
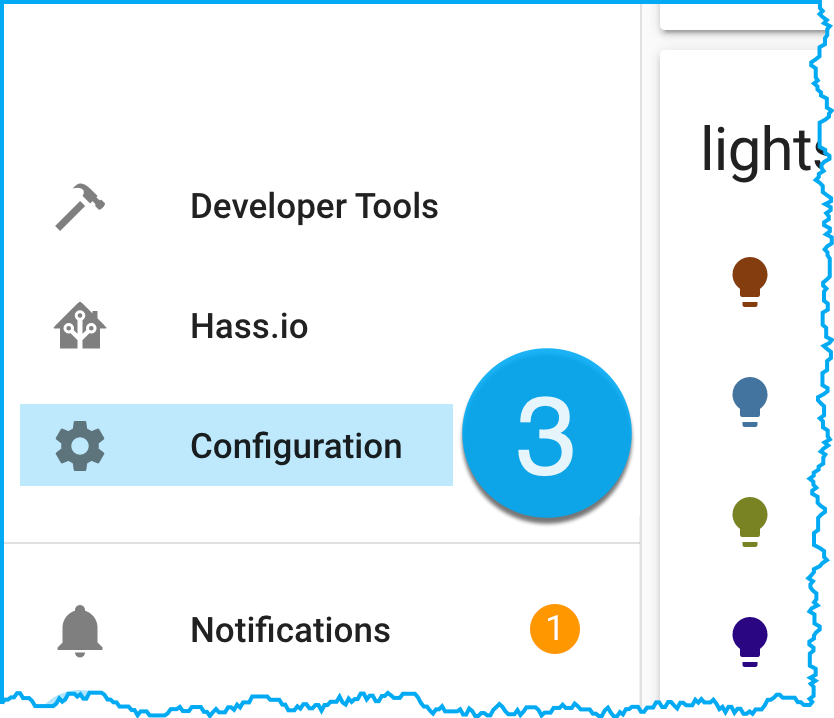
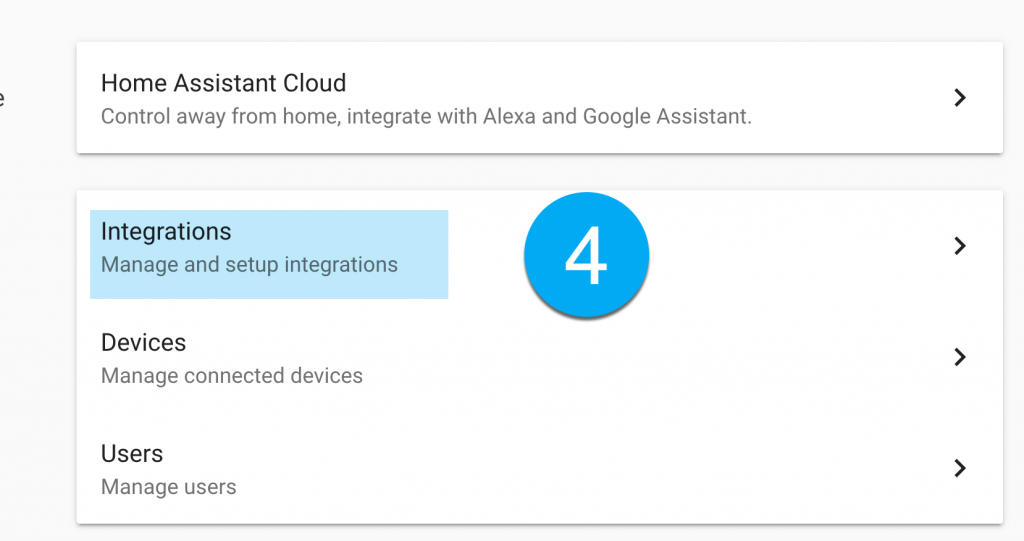
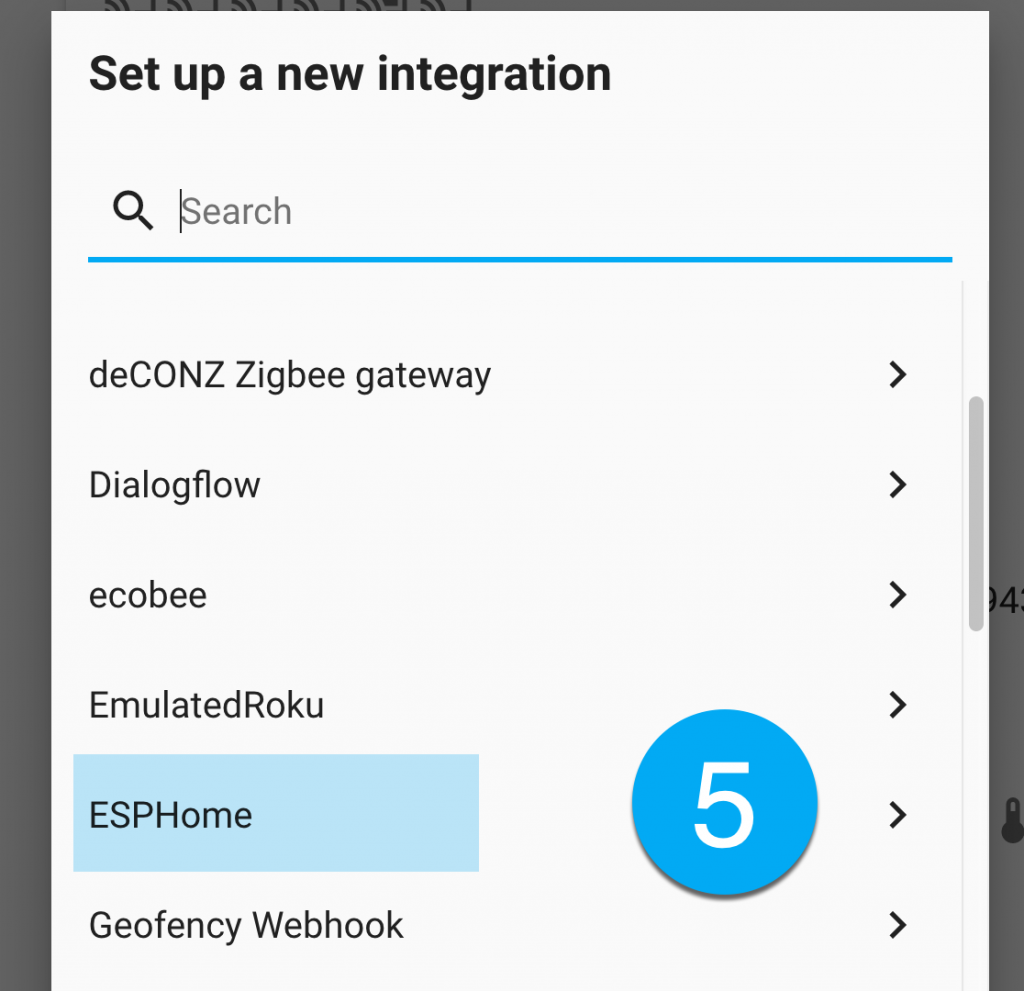
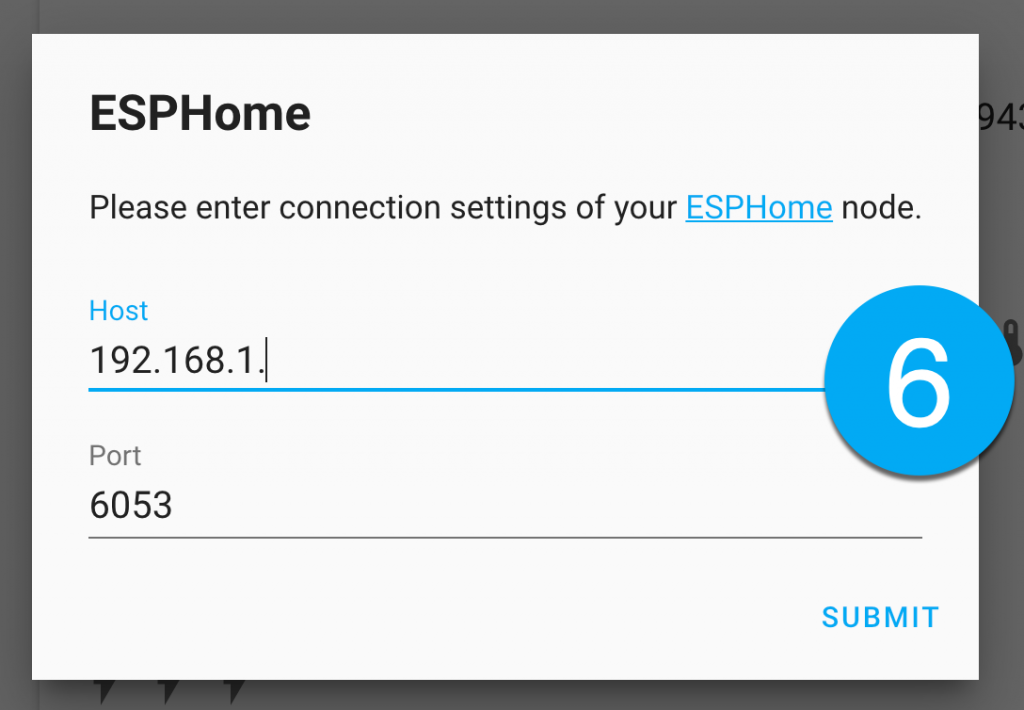
Home Assistant will usually discover an ESPHome device and notify you – taking you to step 7 below. If that doesn’t occur follow this sequence go to: Configuration > Devices & Services > integrations > ESPhome > Enter the IP address > done.