monitor temperature on graphs around the house
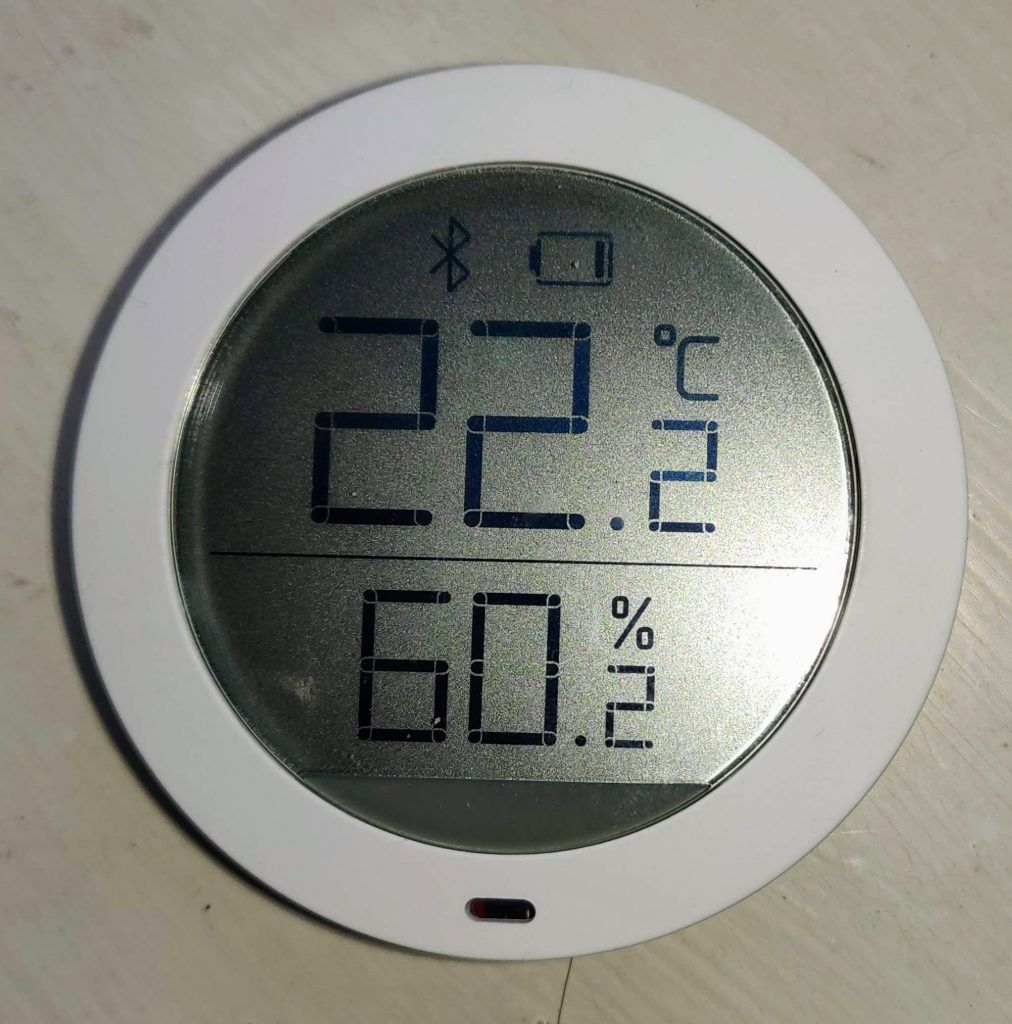
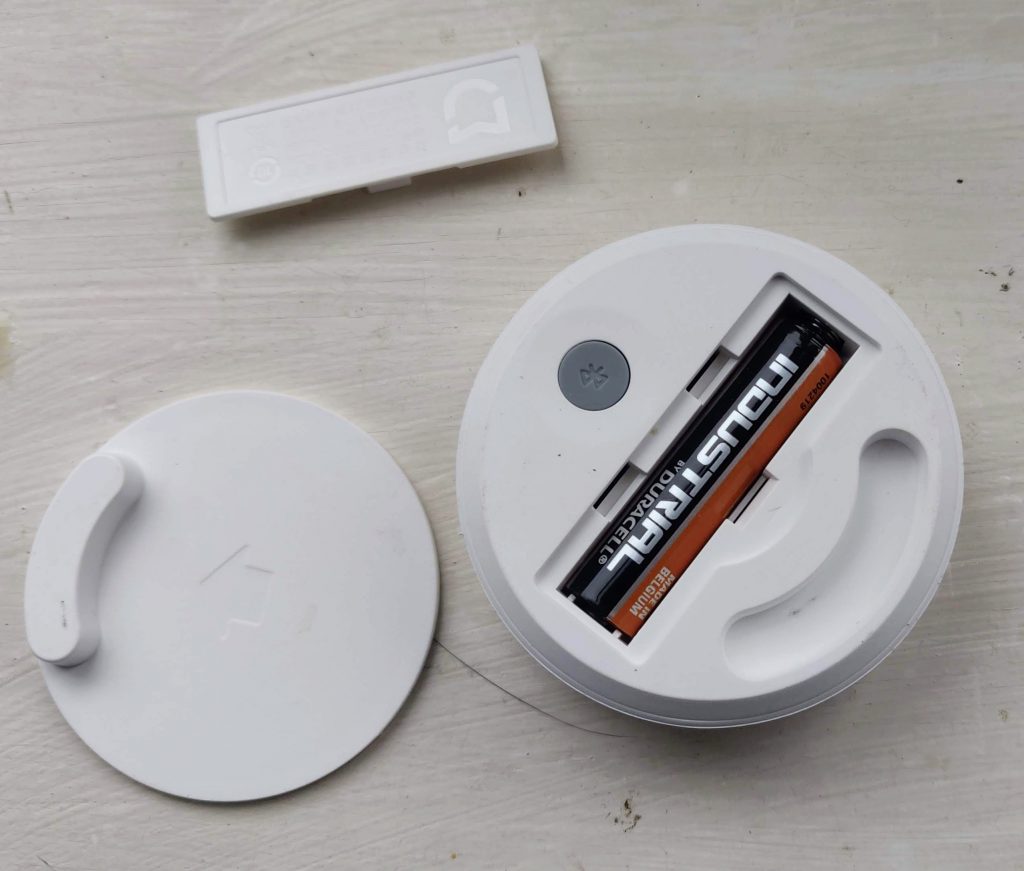
The Xiaomi Mijia sensor runs for ages on a AAA battery and it can be stuck to a wall to show the temperature and humidity. It’s an attractive Bluetooth Low Energy device that beams out measurements for under £10. You’d think that a Bluetooth device eats up batteries but no – this sensor only sends a Bluetooth pulse when the temperature or humidity actually changes. It isn’t even paired like other Bluetooth devices are.
If I install the phone app Mi Home I can receive temperature readings from across the room and wonder what’s the point. The point and the value of this sensor happens when I connect it to Home Assistant and show a graph of temperature over time. If you have a room that’s too hot or cold, seeing its temperature history offers clues to heating it up at the right time for the right amount of time.
This project told me how well my heater copes against the cold outside. My heater is a storage heater that uses cheaper night time electricity to heat up internal bricks. Knowing how much electricity is needed to heat those bricks to warm the room is guesswork. Not so now.
There’s one caveat to getting these temperature readings. The Xiaomi Mijia will need to be in Bluetooth range of a device that ‘hears’ its signal. In the section below we use a Raspberry Pi running Home Assistant to listen. That might be too far away so further down the page I’ll show that you can use an ‘ESP32 development board’ powered by a USB cable. This approach will set you back £6 and no soldering is required. You’ll find this is the better approach – it enables you to measure temperature in remote areas of the house – as long as there’s wi-fi nearby.
How to connect your Xiaomi Mijia to Home Assistant – method one
- Use a Bluetooth app on your phone to pair or search for new devices. You’ll soon see the MJ_xxx device – click on that entry for details and note the Device Bluetooth Mac address. You want to enter that number in place of 4C:65:A8:D9:E0:EE in bold below.
- Now go to the Home assistant Configurator and open configuration.yaml. Add the following code and save the file.
  - platform: mitemp_bt
    mac: '4C:65:A8:D9:E0:EE'
    name: Mi living room
    monitored_conditions:
      - temperature
      - humidity


To display the feature/s just added, we must restart Home Assistant. When Home Assistant is live again, go to the Overview tab. Click Configure UI > + choose a ‘card’ and add a history graph. This is the code inside the card. Save the card and you’ll see the beginning of the graphs below (bottom of this page).
entities:
  entity: sensor.Mi_living_room_humidity
  entity: sensor.Mi_living_room_temerature
  type: history-graph
How to connect your Xiaomi Mijia to Home Assistant – method two
Hardware: you use an ESP32 to collect readings from a Xiaomi Mijia sensor that’s in Bluetooth range
The Xiaomi Mijia has a tiny internal aerial and it needs to be in Bluetooth range of the device listening to it. To get its temperature/humidity readings I use an ESP32 dev board powered with a USB charger. You can use a ESP32-WROOM-32 module but there are many ESP32 variants that do Bluetooth and WiFi. The ESP32 dev board picks up the temperature readings over Bluetooth and then it relays them to Home Assistant over the network wifi. (That might seem troublesome, however this functionality can be added onto an ESP32 that you’ve already set up to do something else (e.g. read my electricity meter).
Software: you use ESPHome to collect readings from a Xiaomi Mijia and send them to Home Assistant
ESPHome is an add-on software feature of Home Assistant, the home automation hub that runs on a Raspberry pi. When you start it you type in title, your wifi password; a network IP address, a series of settings for features plus a few other things. You then get ESPhome to compile this into a firmware file which you install on a ESP32 dev board with a USB cable. You can use the exact same hardware and software as my example project seen here: ESP32 set up tutorial.
When you’ve set up an ESPHome ‘node’ to do such an example project you just need to add the lines of code below. The code below turns on the Bluetooth features of the ESP32 chip.
The ESPHome section of my Home Assistant has a few entries or ‘nodes’ and looks like this:

Edit the ‘node’ or entry that you want to add Bluetooth to, and paste in the following text. You’ll only need to edit the bold items below so that the numbers match the Bluetooth mac address of your Xiaomi Mijia.
# XIAOMI WHITE TEMPERATURE
# TRACKER IS REQUIRED - IT WILL SNIFF FOR ANY BT DEVICES
esp32_ble_tracker:

sensor:
# CHECK FOR PLATFORM TO USE FOR MIJIA. CHECK FOR CHANGES AT www.esphome.io  - platform: xiaomi_lywsdcgq
    mac_address: '58:2D:34:22:E1:69'
    temperature:
      name: "hall temperature"
    humidity:
      name: "hall humidity"
    battery_level:
      name: "hall battery"

SAVE and then UPLOAD this and that’s pretty much it. The code is added to the ESP32 as an over-the-air (OTA) update.

Finally, go to the Home Assistant Overview, click Configure UI > + > History Graph. Then add this code to display a graph of the Xiaomi Mijia which is now presumably in Bluetooth range of the ESP32 we’ve been editing:
entities:
  entity: sensor.mi_humidity
  entity: sensor.mi_temerature
  type: history-graph


I am trying to follow your tutorial but unable to even get past the page for home assistant url, is there any way that i could read historical temperature without home assistant?
A temperature vs time graph is indeed very useful – it’s so useful that it’s tragic or shocking that the app for these home temperature devices don’t provide a history graph.
For me Home Assistant is too versatile to ignore. It provides graphs of
heating oil level,
house electricity use,
appliance electricity use,
cooking oven temperature,
position of the sun (solar panels)
outdoor temperature
freezer temperature
The path to this amount of DIY home automation was troublesome. If you have a Raspberry Pi already I would persist to make progress with Home Assistant or indeed another automation platform.
What kind of range are you getting from the Mijia to the Raspberry Pi? Thanks.
Whether the Mijia is linked to a Pi or an ESP32 the Bluetooth reaches across a five metre room at home. The range is not very good. The signal does go through a wall but it wouldn’t get any distance into the next room.
To recap: to get a good range, and perhaps take temperatures in every room of a house, this project puts an ESP32 in a central place in a house. This project makes recording the history of Mijia temperatures in every room possible – I use one ESP32 to relay the readings to a Pi. I put this ESP32 in the central hall and it can pick up Mijia readings from the immediate rooms.
In short different Mijias each send over a short distance to one ESP32 which relays the readings over the house wifi.