project: plot the temperature of your fridge-freezer, pet home or fermenting wine on a history graph in Home Assistant
In a previous project I set up temperature sensors in my room and sent the data via Bluetooth to Home Assistant, the home automation platform. Home Assistant is software that can record measurements and plot them on a graph. In so doing I was able to adjust the room heater timing for better economy. The same setup could work to adjust ‘air conditioning’.
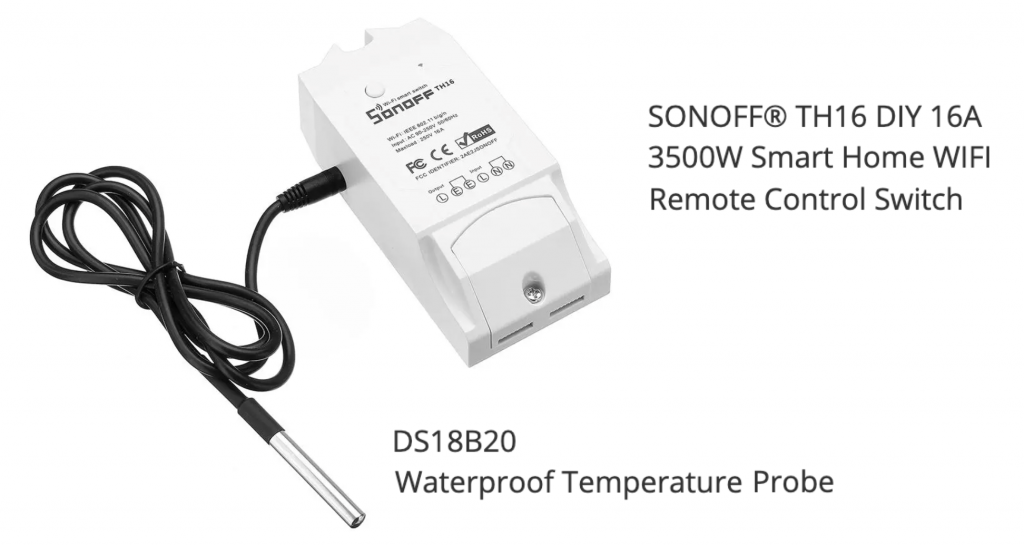
Some situations call for a temperature probe (shown) that can measure low temperatures (eg freezer) or go under water (eg an aquarium) or be just outside the window. A temperature sensor that responds down to -50C and is waterproof is the DS18B20. It connects to a socket on a *Sonoff TH16 or TH10 which also contains a relay. When my freezer temperature alarm started beeping at random I felt the need to check what was going on. To cut to the end of story I learned that the freezer was in fact keeping food cold and that the problem was due to a failed sensor in the freezer.
(The TH10/TH16 has a relay that, in conjunction with the temperature reading, can switch a heater or cooler on and off as needed. In theory you might use it to maintain temperatures in a pet hutch, incubator or a room. We don’t use the relay here but at £15 the unit is good value even for a temperature probe).
*The Sonoff TH10 has a 10 amp relay and the TH16 has a 16 amp relay.
There’s no need to modify (ie flash) this Sonoff unit to have it working in Home Assistant
The only thing to do to your TH16/TH10 is to add a cable and a plug to connect it to the mains. You install the Ewelink app to a mobile device and add the TH10/TH16 to it using the standard app pairing process. The app is now able to turn the relay on/off as well as tell you the measured temperature. There’s one setting to make in the app: turn on local LAN mode.
It’s now time to place your device near the freezer so that you can pop the temperature probe inside. We now need to get the temperatures into Home Assistant. This way we can record the data over time and do some data logging.
Get the AlexIT Sonoff add-on component into Home Assistant
- Here I assume you already have Home Assistant running on a Raspberry Pi as we did here.
- Get the Sonoff add-on component from AlexxIT. Get your login details for the ewelink app.
- To install the Sonoff add-on software in Home Assistant copy the Sonoff folder to your Home Assistant config/custom_components folder. Use Samba or FTP to do that. In 2020 the add-on was unofficial so check the Home Assistant docs to see if that changed.
- In File editor open your configuration.yaml and add the code below:
sonoff:
  username: +910123456789
# important to use country code if your username is your phone number
  password: mypassword
  mode: local
  reload: always
After a restart, find your Sonoff switch entity and add a temperature sensor
- Restart Home Assistant and look in the list of entities to find a sensor called something like “sensor.temperature_sonoff“
- Now go to the Home Assistant frontend or Overview. In the top corner find Configure UI
- Add a History graph card and or a Sensor card. That’s it.
- BTW I also used a Sonoff POW2 to monitor the current use by the freezer. That’s explained here
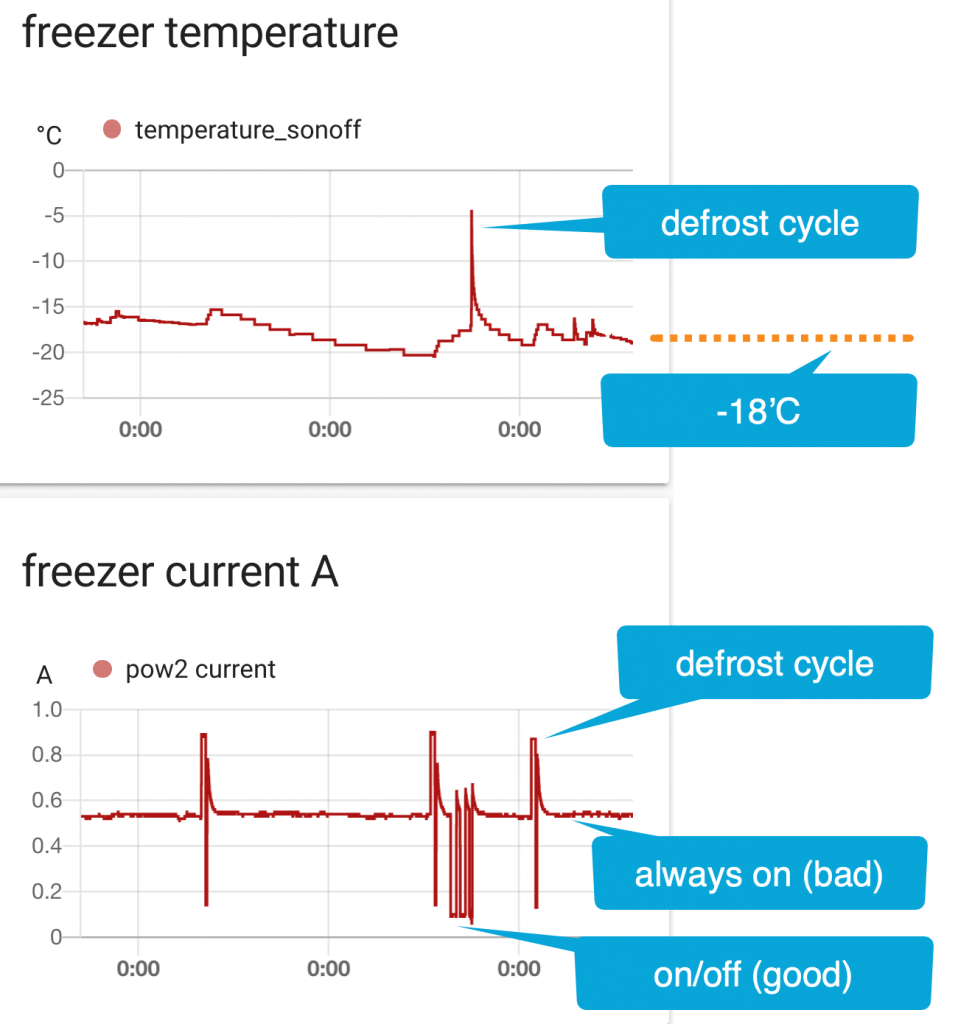
The results helped show that the freezer wasn’t ready to be thrown away. There’s a problem in the freezer’s own temperature measurement.
Next project: measure the temperature of the freezer using an Oregon Scientific Weather station in Home Assistant
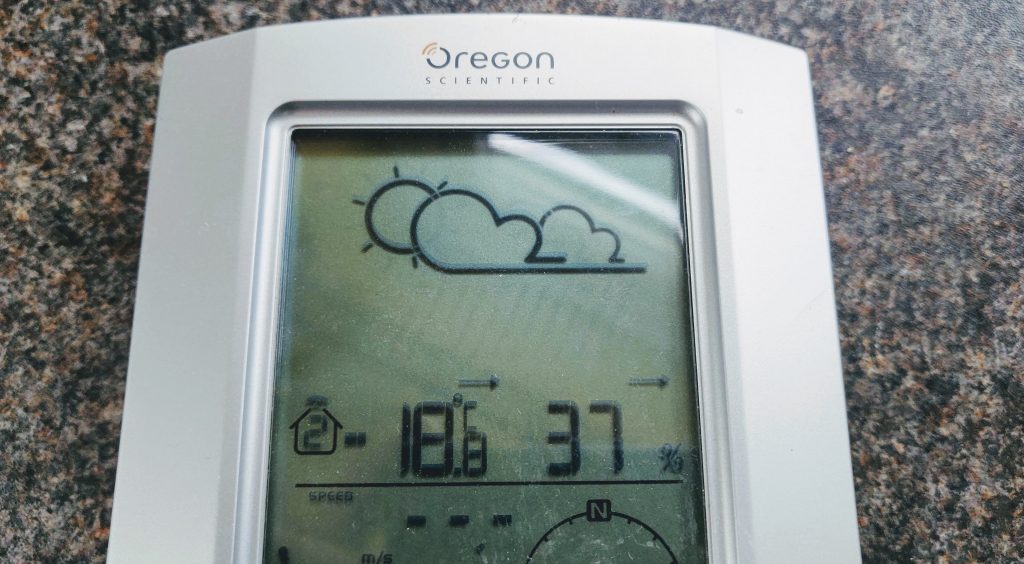
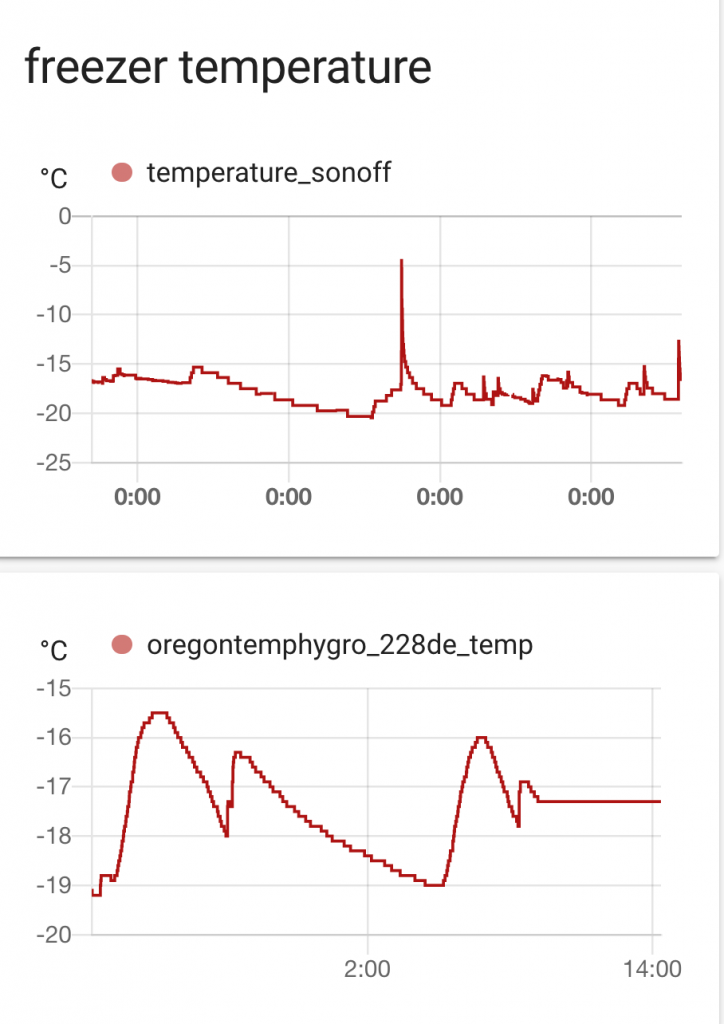
It’s a good policy to check your results by having more than one temperature probe measuring your problem. So I’ve put the outdoor temperature sensor from Oregon Scientific in the freezer too. This is a 433MHz RF sensor so the display can sit far away from the freezer. It sends a reading every minute to an RFlink module in this project. Here’s are the results – more detail next time.
