sound & motion activated LED light strip for a staircase
WS2812B strip – INMP441 microphone – WLED SR software – ESP32 board
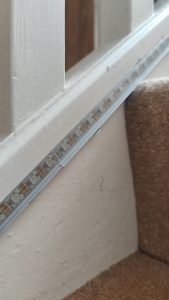
A 2 metre LED strip runs beside the staircase and movement triggers a light pattern along the strip. If the sensor is a microphone, rather than a motion sensor, our lights can respond to each footstep and make our staircase a bit more ‘interactive’. This write-up shows how to connect a microphone chip to WLED software on a ESP32 board.
PIR sensors, like those on a security light, or a rcwl-0516 microwave sensor can also be used to detect people. The microphone does this as well as respond to music.
shopping list for these motion activated stairway lights – see photos
- INMP441 I2S digital microphone / sensor – cost £2-£5
- Raspberry Pi running Home Assistant
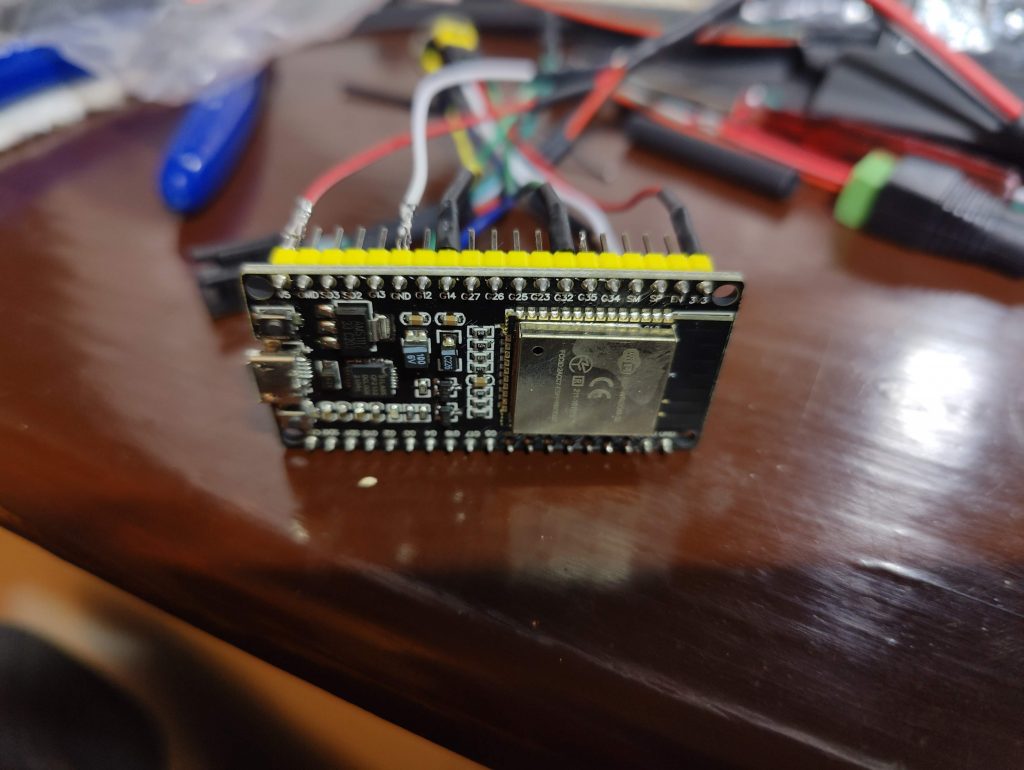
- An ESP32 development board to run software that controls an LED strip. I use ‘WLED-SR’ (sound reactive version of WLED). Find examples of suitable boards below at cost <£12
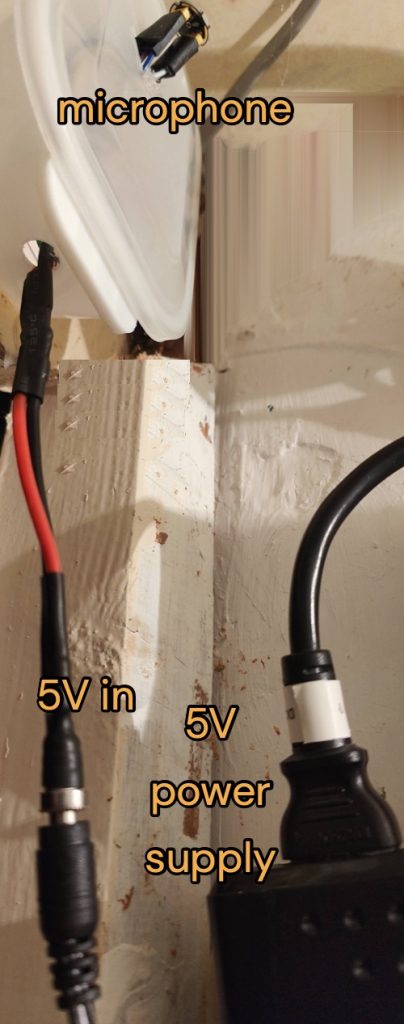
- A project box such as an electrician’s junction box – drill a hole in the box if you want the microphone to protrude. You can screw the project box below the staircase treads where it can pick up vibrations / movement
- A power supply capable of 5 amps at 5v – I’ll assume that you’ll not run these lights full on. If the lights only ever turn on briefly, a 3 amp power supply may be suitable for your initial setup.
- Female Dupont wires if the microphone sensor has pins – otherwise you may solder the male pins of Dupont wire onto the sensor
- For the 5v power feed to the lights I use silicone insulated cable 18 awg or 20 awg especially for a long cable run to the top of the stairs. This silicone insulation doesn’t melt when you solder the wire and is nicer to work with.
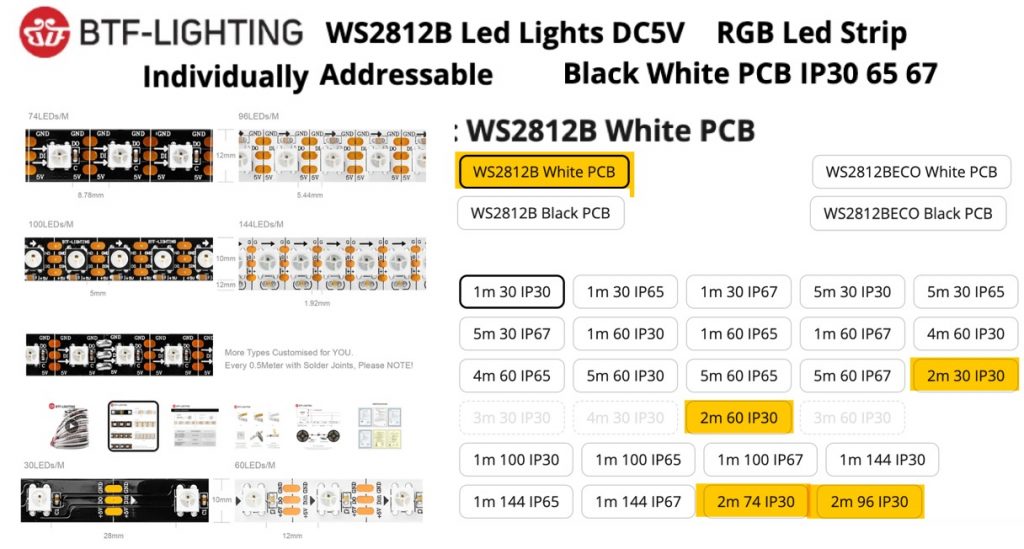
- Two metres of 5v addressable LED strip – for example 5v WS2812B from BTL lighting at aliexpress. The choice of strips shown below is probably overwhelming but the 5v WS2812b can work up to 2 metres when powered from one end. You may find a choice between 10mm and 5mm width strips. The versions with 60 LEDs per metre will do. I would choose IP30 versions if the strip is going to be encased in an aluminium profile but you could use IP65 LED strip which has a protective silicone domed coating. The IP67 version is encased in a silicone sleeve, is well protected but you still might need to cut the protection to join strips to make a 2 metre run.
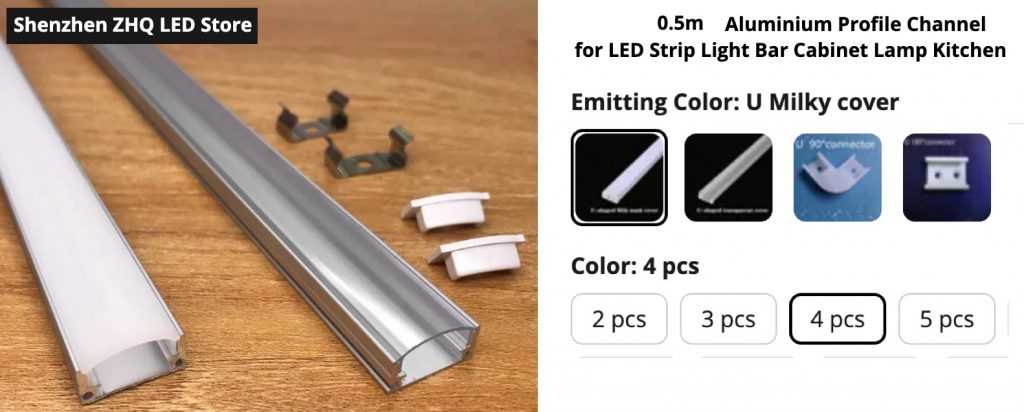
- Aluminium channel / profile and a milky diffuser cover to hold the LED strip in place. I believe the channel to be attractive and useful as it is unlikely that the sticky back of an LED strip will hold the strip for more than a few months. Check that the width of this channel will fit the width of your LED strips. See the example channel below which comes as 0.5m long pieces so you’ll need four for 2 metres. Choose a clear cover if you like to see LEDs as dots.
- A staircase with a mains socket to power the project – eg a staircase with a void or cupboard below it


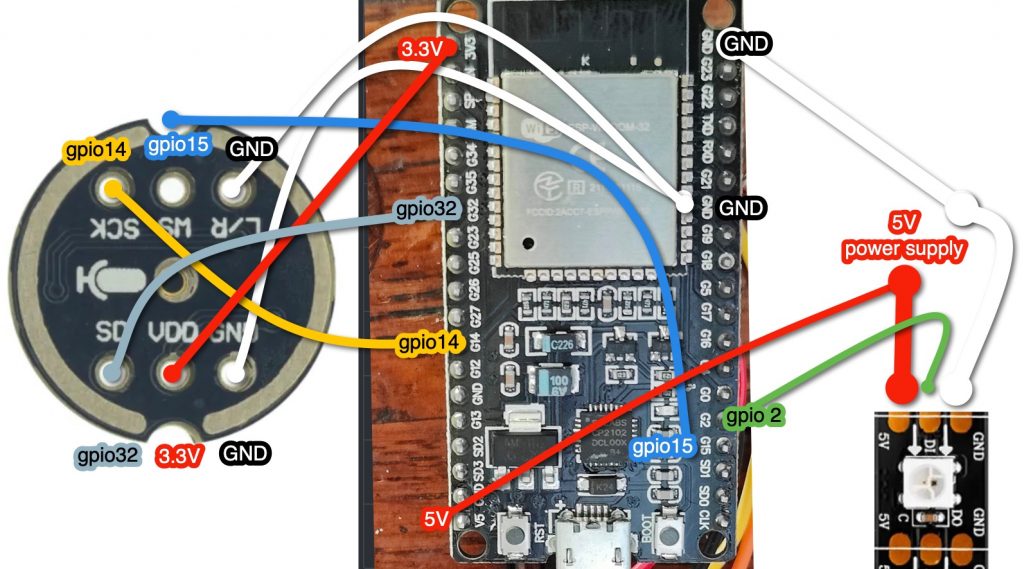
wiring diagram for a microphone controlled LED strip
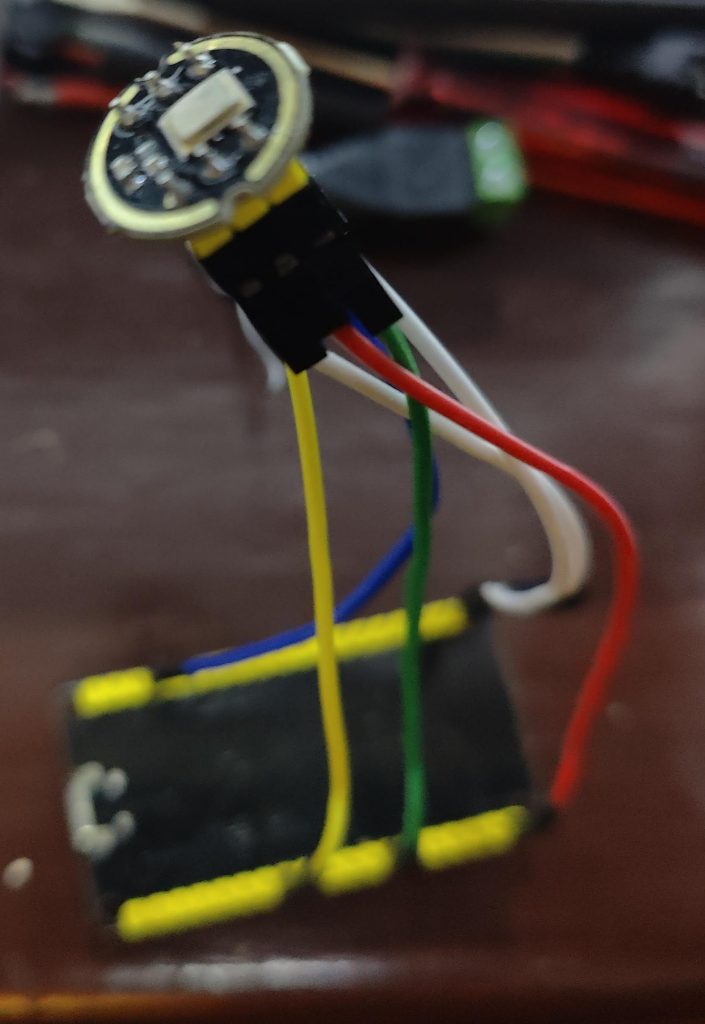
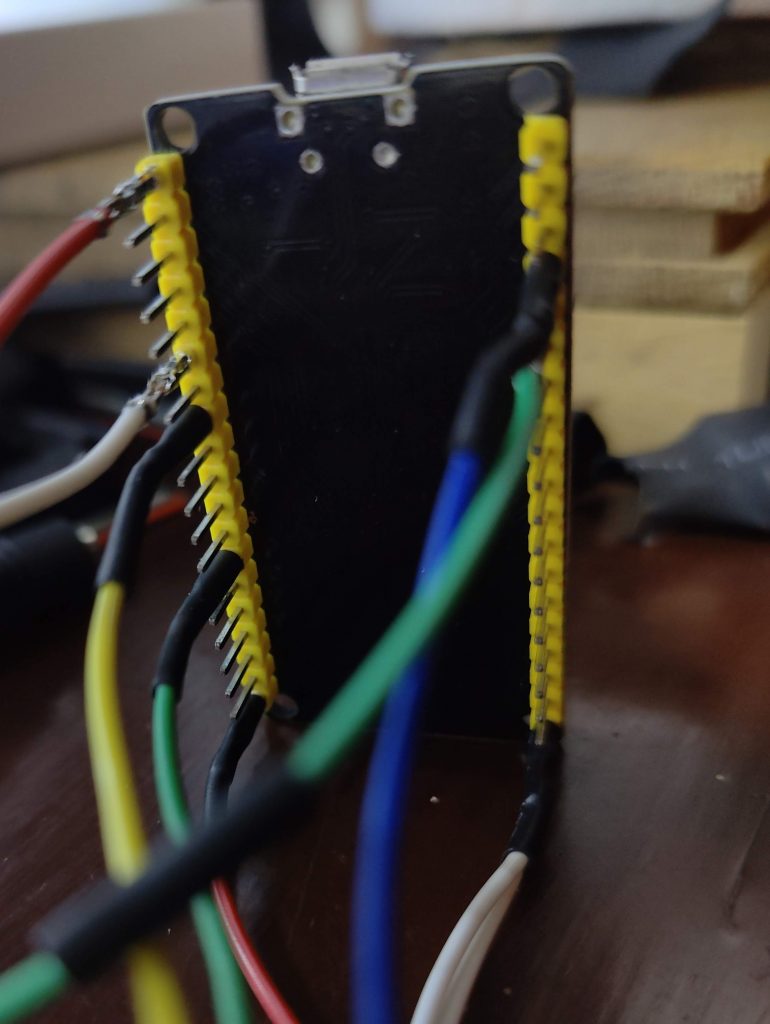
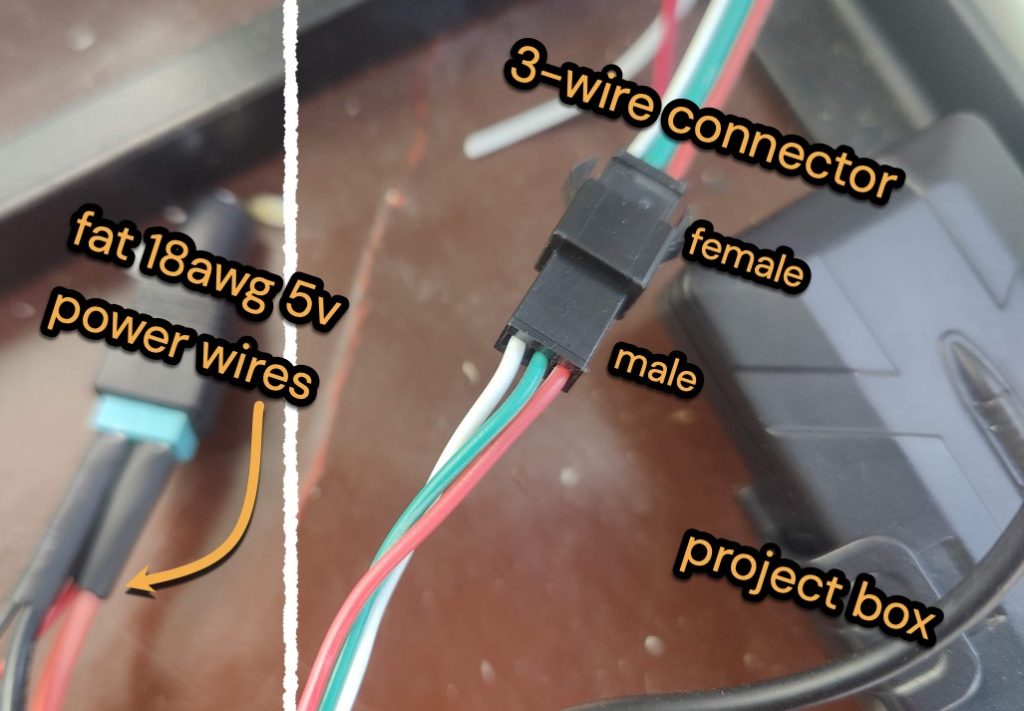
The wiring is shown in the next two diagrams. I solder and glue the connections after I’ve passed wires through whatever I’m using as a project container: check twice and solder once. The LED strip should arrive with a three-way connector at each end. The LED strip must be connected from the end shown by arrows. Cut off and use the male three-way connector and its leads from the far end of the LED strip – you’ll join its skinny red and white wires to your power supply with fatter (eg AWG18) wire. Solder the green (signal) wire to GPIO2. Check everything again as damage can result from reversed polarity. You will not see even a single LED lit until we’ve installed software on the ESP32. Label the power input as ‘5 volts’ as you don’t want the wrong power supply to be connected ever. It is very important to know that the LED strip is directional – meaning that it has a start end and a finish end.

install wled sound reactive
Disconnect the power lead from your 5v power supply to install the software on the ESP32 board. Instead power the ESP32 board via USB with a USB data lead from your PC or Mac. Go to https://install.wled.me and follow along to install WLED Sound Reactive. When this completes your ESP32 will create a WLED wifi hotspot. The instructions tell how to connect to this and to enter your own wifi details. After a reboot the ESP32 board will be running WLED and connected to your wifi – you should be able to access it with a browser and an IP address. If that’s not happening, the mobile WLED app will find your setup and allow you to change the settings below.
which settings in WLED need to change?
Here’s a list of WLED settings to check or change –
- as above you must add your wifi details to WLED. You can set a fixed IP address for this if like me you fail to find WLED on your network.
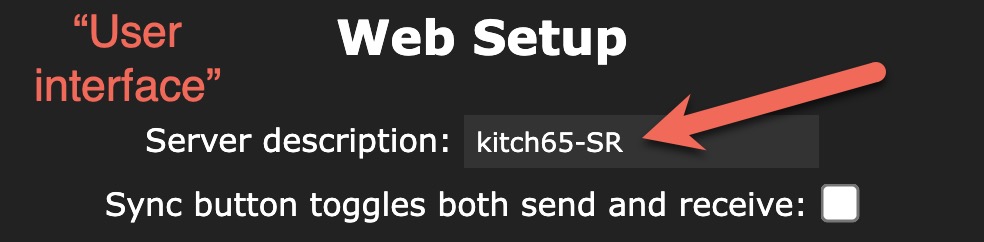
- go to User interface and change the ‘server description’ to ‘staircase’. I named mine ‘staircase65’ to remind me that the IP address is say, 192.168.1.65
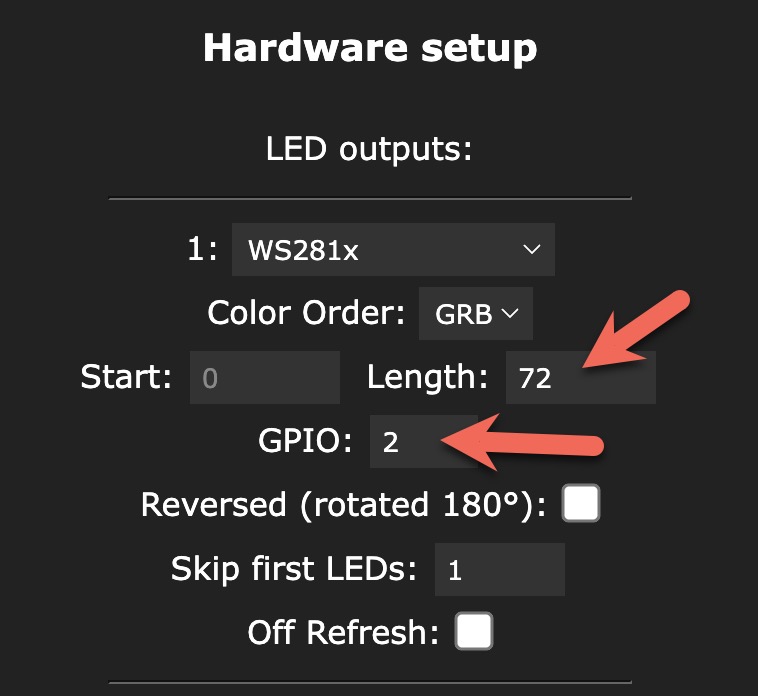
- go to the LED settings and enter here the number of LEDs on your LED strip
- ensure that the GPIO to trigger the lights is set to GPIO2 (this is the pin you connect to the green wire on the LED strip). It is very important to know that the LED strip is directional meaning that it has a start end and a finish end.
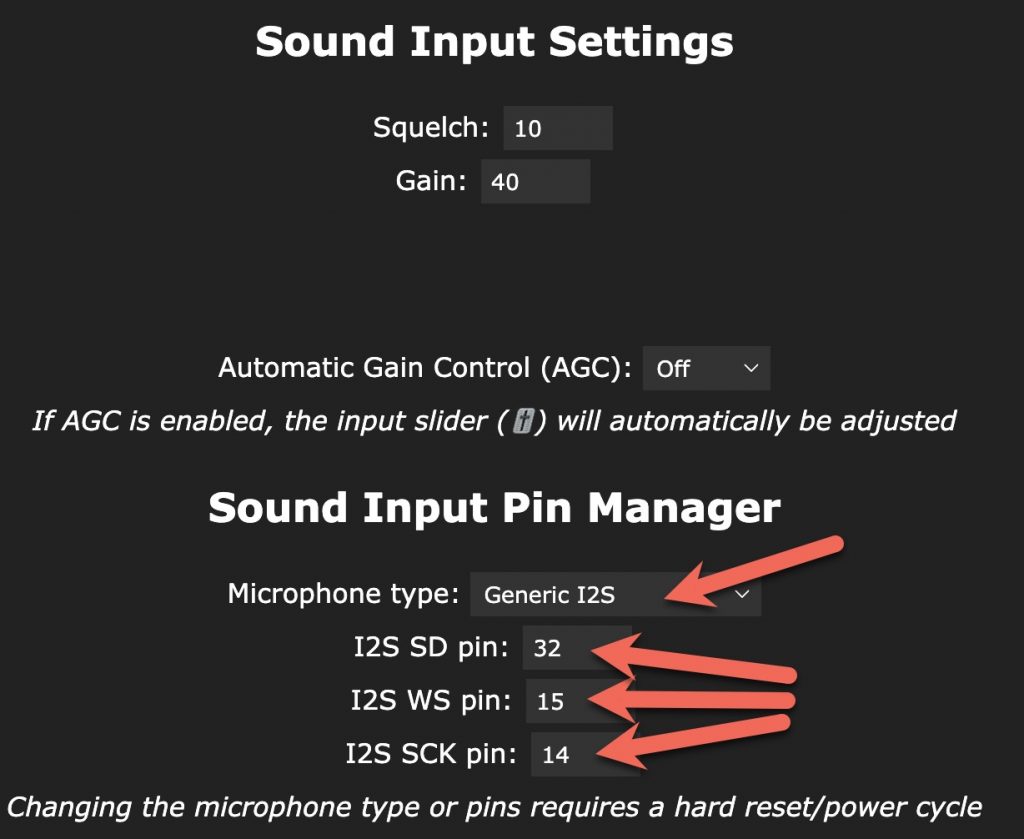
- under sound input settings enter the GPIO pins that you used on the microphone sensor – as shown below these will match the wiring diagram above.
- optional fun: under sync interfaces go to ‘audio sync’ and enter the mode as send/receive/disabled. The reason is that if you have you have other LED strips running WLED these can be set to respond to the staircase microphone.
have a play – connect to Home Assistant
What begins now is a learning curve to get one’s head round two variables: the LED effect and its colours. Go to the IP address of your WLED device using a browser and play with the colours and effects. The colour Black is useful – it’s the background! The effects that respond to sounds are labelled so. Don’t be concerned if effects, such as one named ‘Noisefire’ insists on using its own fire-like colours. The settings for the gain or sensitivity to sound can be changed.
If you have Home Assistant running on a Raspberry Pi your WLED controller should be discovered so you can add it to the Home Assistant dashboard and control it from there. If the WLED isn’t discovered you’ll add it manually (Integrations > WLED > enter IP address of the WLED controller). (As you add presets to WLED (below) Home Assistant will pick these up. You can change presets* with Service > Select Next or use a Service Select <name of preset> as below).
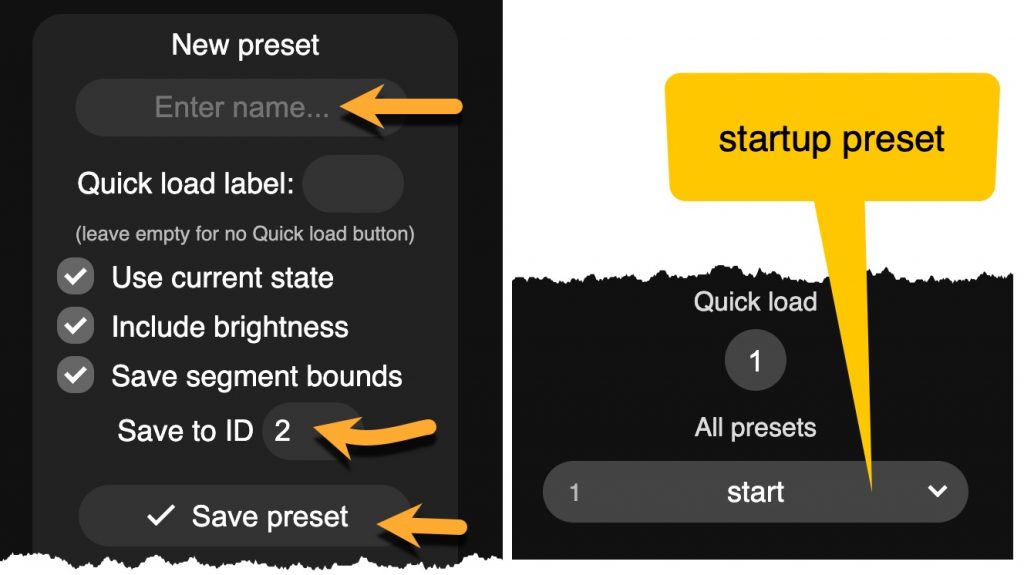
create preset colors and effects and set a default preset
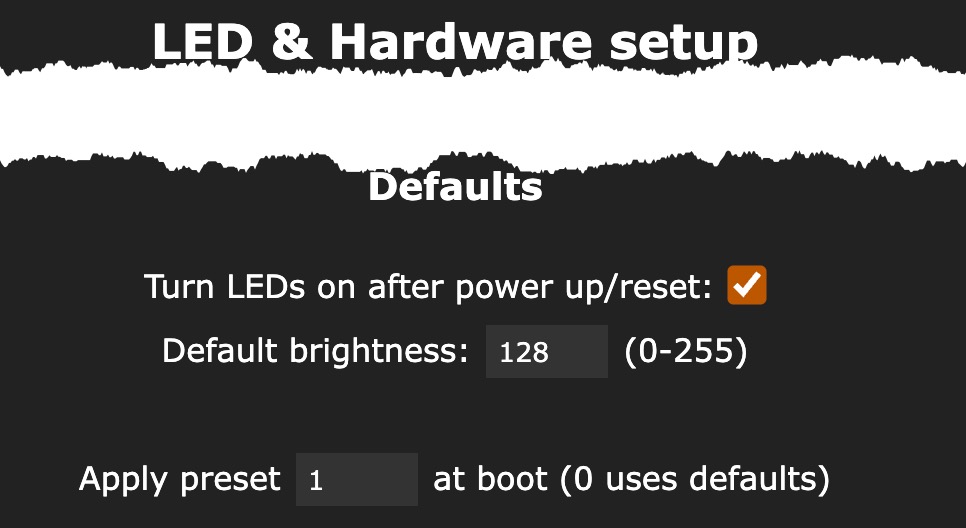
After COLORS and EFFECTS the next most useful feature allows you to memorise your choices as PRESETS. Go to the IP address of your WLED device and set colours and an effect that you want remembered as a default staircase preset. Click PRESET to save the settings as say, preset number 1. Now go to CONFIG > LED & Hardware setup and find the section shown below. If you save this, when the power goes and returns your staircase lights will start using your chosen preset.
Create a few presets – perhaps you want different staircase effects at night, daytime and evening?
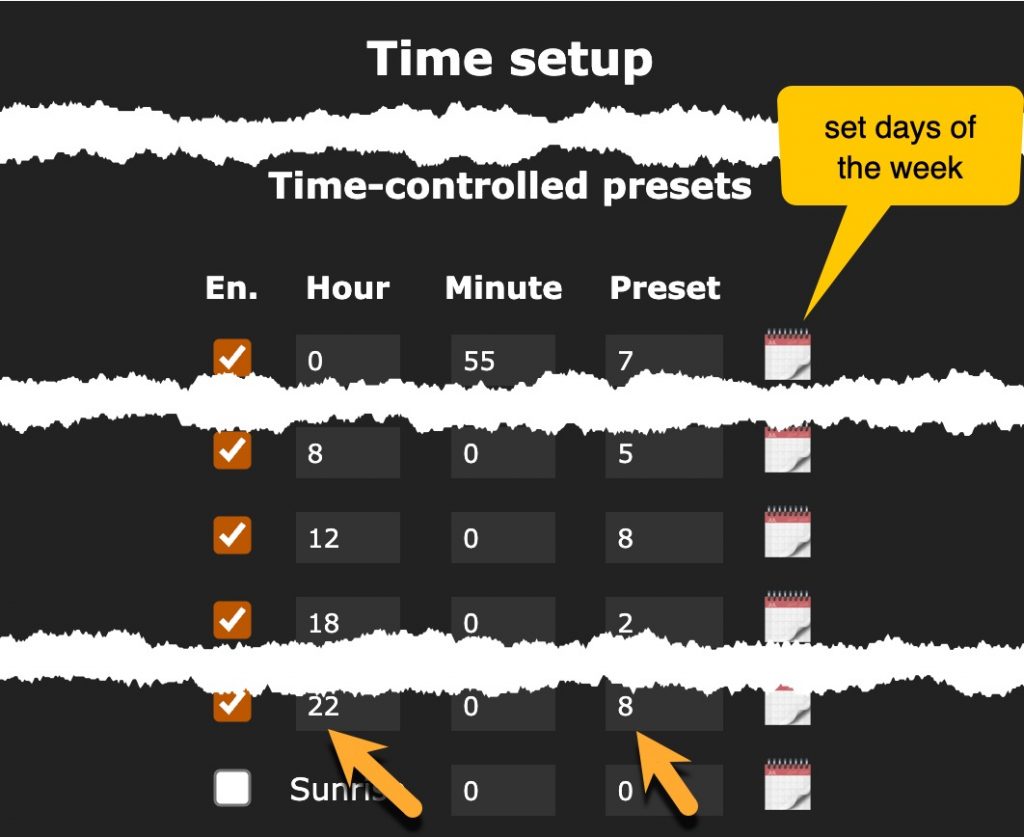
use a timer to swop presets for different times of day
Let’s say, as suggested above you’ve saved a few favourite COLORS/EFFECTS as presets… and you now want a different preset to be active in the day, in the evening and overnight. Go to CONFIG > TIME & MACROS and find the following section in Time Setup. On each line click Enable; enter the hour; the number of the preset and the days of the week. Fill what you need and leave the rest blank. Other settings in this section allow you to ensure that WLED always knows the right time to switch presets.
Backup: if you’ve spent an unreasonable amount of time setting up WLED go to CONFIG > SECURITY & UPDATES > Backup Configuration > save the file on your PC.
what effects work well for you?
Leave a comment below – your email address will not show and it will be hidden away safely.
*Home Assistant preset switching
The first item below, which can be part of an automation or script, chooses a specific preset. The second item simply calls the next preset option. The second item will not fail when you’ve renamed a preset! See the YAML code below to use it as a script so you can add it to a button on the dashboard.
service: select.select_option
data:
option: sound waterfall
target:
entity_id: select.stairs35led_preset

OR

service: select.select_next
data:
  cycle: true
target:
  entity_id: select.stairs35led_preset
OR AS A HOME ASSISTANT SCRIPT
alias: STAIRCASE - next light pattern
sequence:
  - service: select.select_next
    data:
      cycle: true
    target:
      entity_id: select.stairs35led_preset
mode: single
icon: mdi:stairs-down