a DIY security camera system with object detection, recording and phone notifications – using Docker, Frigate and Home Assistant
Let’s start with the suggestion that an easy route to a security camera setup is to buy a kit with cameras and a system box to record events on site – you’ll find plenty of promising 4K POE 8 megapixel camera at Amazon. You might however be interested in something that’s not only awesome and flexible but integrates well with Home Assistant and your other smart devices. Below I explain what a Frigate camera server can do for you and what you’ll need to work it. You can test my project on an old desktop PC or laptop with of course a suitable camera.
what a ‘Frigate’ camera server (NVR) can do for you and what you’ll need to work it
links to nearby posts about Frigate:
- reasons to have cameras; what Frigate can do; how to set up Frigate on Ubuntu or openmediavault
- how to setup Frigate and get the GPU and Coral working in Proxmox
- how to set up Frigate on Proxmox on an old PC
- example ‘core’ camera setup for Frigate NVR and how to get your images sizes
- how to start using Proxmox and virtualization
reasons why you might have a need for this:
An IP camera is not only useful in 24/7 security – I use mine to know when a delivery vehicle arrived or need to check the cat was eating, or the birds were feeding. I’ve also watched the chickens, the visiting fox, the letterbox, the 3D printer and monitored a roof leak or the refilling frequency of a water tank. An IP camera has a myriad of uses (but do take care re-privacy and permission). An IP camera is an always-on camera that’s remotely connected, over the web, to your computer. (This is different to the webcam on your computer that needs the computer always turned-on. You CAN use this but an IP camera is not what I call a webcam – even though this nicer word implies it).
I’ve been experimenting with different IP cameras for a very long time and my key need is to be able to see what happened rather than whizz through hours of footage to find the event. That’s where AI and Frigate comes in and on this page I’ve outlined how I set it up. This process is no small journey as it involves a wide gamut of skill with Linux, Docker and networking. However you’ll gain a fabulous system server that is always ON so you can add other server apps such as plex media server. Your daily driver PC has no part in this other than to set it up and ‘watch’.
I am using a selection of outdoor cameras (Wansview, Wanscam, Reolink, Vstarcam and other ONVIF cameras) bought randomly over the years. Some of these use wired ethernet (good); but many of them use wireless ethernet (less good). Until Frigate arrived it’s been a pain to find a single item of video recording software that gave them both the magical power of object detection and worked with all of them. You could install useful software on your everyday PC, but for 24/7 use you’ll need an always-on computer (aka the ‘server’).
Note that Frigate can’t use many of the modern ‘cloud cameras’ which work exclusively with their own apps. There are exceptions. I have found some of these cloud cameras (Logi Circle; Blink; Eufy) to work excellently as they are with their own apps. They may also do object detection to filter out irrelevant alerts and be a match for what Frigate can do.

what you get and can do with this Frigate NVR set up. You can:
- record short clips of events involving people, pets, cars, vehicles, airplanes. Fine tune the detection or ignore events for example when you come home with your car.
- provide fast, not laggy access to camera feeds, snapshots, recorded clips via a local URL or from within Home Assistant. Optionally, the clips also appear within the Home Assistant media folder sorted by camera, date, or object type.
- massively enhance the value of old or disappointing security cameras by connecting them to the very efficient Frigate app. You can continue to access your cameras as you normally do*.
- no subs or ongoing costs – and no need to replace micro-SD cards that some cameras seem to chew-up to store recordings
- no privacy concerns due to offsite ‘cloud’ access to your cameras – everything here can be kept local
- fence-off areas in each camera image where you want to ignore movement or mark areas that you especially want to keep on eye on (‘masks’ and ‘zones’)
- receive an actionable notification with an thumbnail on your phone (or the TV!) for events you’re interested in
- create automations in Home Assistant that turn on a light or open a garage when triggered by a camera event
- record everything all the time – depending on your system’s ability to record multiple camera streams. You can but try and see.
- have fine-grain control over how long you want to retain the clips recorded by each camera. By default clips are retained for 10 days. My ten days of event storage used 2GB per camera which hardly dents the 4TB drive that I’d made available.
- *unlikely to work with proprietary ‘consumer’ security cameras that, out-of-the-box, offer to do it all for you (Blink; Ring; Arlo; Logi Circle; Nest; echo show; Eufy. These brands may upload recordings to a paid cloud service or they record on an internal microSD card). You’d need access to the cameras feed and this might be rather well secured. My suggestion: get another camera but continue to use the proprietary camera with its app.
- works with many semi-professional IP cameras (see next para). The setup below is hard but not impossible to use with a computer webcam, including a Raspberry Pi camera, that’s built-in or connected via USB. In all cases you need to map the USB device into a Frigate docker container. See this link to HomeAutomationGuy’s guide to this process.
what you’ll need to set up a Frigate NVR with Home Assistant:
- an always-on computer to run the Frigate server. The computer ought consume minimal energy and yet be powerful enough to record multiple camera streams and detect objects and changes. An Intel NUC or a Raspberry Pi4 with a drive for media storage ought to do a basic job. The computer will run ‘headless’ but you’ll need a keyboard and monitor for the boot OS installation.
- Home Assistant, which just needs a Raspberry pi computer, is optional but if you install the Frigate integration you’ll be able to see your cameras away from home. To access Home Assistant when you’re away from home you’d set up a duckdns.org subdomain (see here for this) or use Tailscale (see here for this).
- In my first Frigate project I used an old Fujitsu Esprimo desktop box (i7-8700 @3.20GHz with 8GB RAM plus internal storage for the camera recordings). This is set to boot the OS on a USB stick (as otherwise it will boot normally into Windows 10). Mine may use more electrical power than yours does but it workless silently and was bought inexpensively from ‘Stone Refurb’ in the UK.
- in 2020 people wanted a coral.ai USB Accelerator which plugs into a USB3 port on the computer. This adds incredible power to the object detection process in Frigate whether you use a big computer or a Raspberry Pi. (See below). On some machines you can use the GPU to add this power (see my menu above for that project).
- it will help if you know the resolution of your camera. Popular resolutions include
- 4K (9mp or 4096 × 2160);
- UHD (8mp or 3840 × 2160);
- FHD/2K (2mp or 1920 x 1080);
- HD (1mp or 1280 x 720) or
- SD (0.4mp or 720 × 576) resolution.
- your cameras (aka IP cameras) must have a rtsp:// stream. The camera details or app may list different URLs for its high resolution and low resolution streams. (Frigate has tools to detect these streams on port 1984). To save computer ‘effort’ Frigate uses the low resolution stream to detect people or cars in the camera image. If the detection process yields a positive result, Frigate records the high resolution clip to disc. If the camera app allows it, adjust the low resolution stream to small; 5 fps and one key frame per frame. Many semi-professional security cameras that mention ‘ONVIF’ in their specs are likely to have a H264/H265 rtsp:// stream. TCP is preferred over than UDP. You’ll need to know the login / password and URL of the camera streams that will begin something like rstp://192.168.x.x. Often the camera URL will include the login password such as in rstp://username:password@192.168.x.x/live/channel0.
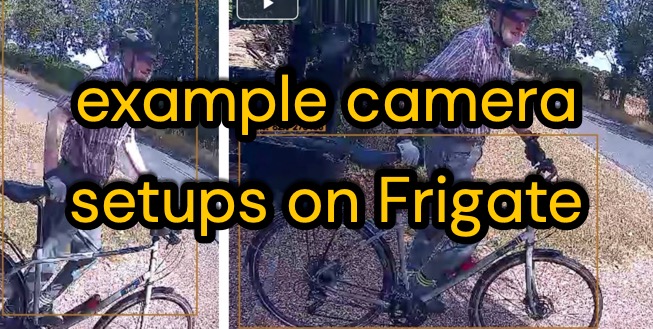
- if you want to see some example camera configurations in Frigate see my project
- your camera URL / IP must never change and there are a couple of ways to fix its IP address:
- if you have access to the camera’s app, get the camera to self-assign a never-changing IP address (example below). Ideally set your broadband router DHCP server to allocate IP addresses over a range that excludes this IP address. For example, if your camera IP is self-assigned to 192.168.1.156, you set the DHCP allocation range to 192.168.1.165 up to 192.168.1.255
- alternatively: use settings in your broadband router to reserve an IP address based on the camera’s MAC address. As above, if you can, set your broadband router DHCP to allocate IP addresses over a range that excludes this IP address. E.g. as shown here:


how to set up Docker and Frigate:
- Frigate runs on Linux and it runs even better without the bloat that a ‘desktop GUI’ adds. You want a server version of Linux without a desktop. Ideally your PC has a small second hard drive on which you can install a Linux server (eg Ubuntu server or openmediavault) to boot from. I use openmediavault – it seems like a whole new thing to learn, however it makes light work of setting up drives and services such as Docker and thus it can be recommended. See my link to a video below which also installs omv-extras and ultimately ‘docker’. If you want to use Proxmox, which allows you run say, Frigate; Home Assistant and pretty much anything on the same system, I’ve a post about that.
- For my first attempt to get a Linux setup I installed ‘openmediavault’ on a USB stick which becomes the boot drive for the computer. Openmediavault makes light work of setting up drives and services such as Docker and thus it can be recommended. To make this possible we briefly need another USB stick which holds the ‘openmediavault initial installer’ image. We use Balena Etcher to copy the openmediavault installer image to USB, and then boot from this USB installer to get to the blue openmediavault setup screen. Now we can insert another blank USB stick to use as the destination drive and continue with the install. I use Kingston DataTraveler Exodia DTX 32GB or 64GB drives. For a walk-through of which buttons to press see the video by technodadlife – but remember that you want to install from the USB installer drive to another USB stick rather than the internal hard disk. (However if you have a small (say 250GB) internal drive you can install on that instead of the external USB). When the installation finishes, remove the installer USB stick so that you boot from the destination USB drive. Openmediavault runs as a ‘headless’ server so you access it via a browser on another machine as e.g. http://192.168.1.157. The login is initially set as ‘admin’ and ‘openmediavault’.
- Follow the video by technodadlife to install openmediavault. You want to end up with two shared folders, accessible by ‘everyone’. The one that stores your docker configurations might be called ‘dockconfig’. The other that stores your Frigate recordings might be called ‘media’. I’ll refer to these names below. You’ll need to note the ‘absolute paths’ of these folders and typically these look like ‘/srv/dev-disk-by-uuid-various_numbers’. Follow the tutorial to install openmediavault-extras as well as Docker and Portainer.
- Now test if you can remote access via SSH to the computer. I also set openmediavault to run an FTP service to give me access to Frigate’s media – however Home Assistant gives you this access anyway.
install the Frigate Docker image
- Frigate is installed as a Docker container using a script / text file saying where to save media and where to save the the configuration. I do this via Portainer > add Stack.
- Getting this docker-compose.yml right is tricky for your system. Before you create the container you’ll need
- to change the image type to the one that matches your computer. Mine is a desktop PC hence my image ends ‘amd64’. Yours might be a Raspberry Pi hence the image for yours might end ‘arm7’.
- to change the devices list to what you have: I have a Coral USB so that line is uncommented. If you have nothing special uncomment (ie activate) the line for intel hwaccel.
- to change the volumes to the ‘absolute path’ of a shared folder you created in openmediavault (see technodadlife video). Set the permissions on these to ‘Everyone’ just now. Later you may choose to limit access to a user but you’re still pretty safe with ‘everyone’.
- to create a text file called ‘config.yml’ and put it where you’ll store your camera configurations. In the volumes section below you’ll see that I store mine in the shared folder ‘dockconfig’ under ‘frigate’. You must do this step because Linux is likely to create a folder called ‘config.yml’. If there’s a file there already it won’t do that and it’s a reason for Frigate to not start.
- Another point of failure may be due to permissions that may require you to know the PUID and PGID of the admin user.
- See the docs to run the compose file
version: "3.9"
services:
  frigate:
    container_name: frigate
    privileged: true # this may not be necessary for all setups
    restart: unless-stopped
    image: ghcr.io/blakeblackshear/frigate:stable
    shm_size: "64mb" # update for your cameras based on calculation above
    devices:
      - /dev/bus/usb:/dev/bus/usb # passes the USB Coral, needs to be modified for other versions
#     - /dev/apex_0:/dev/apex_0 # passes a PCIe Coral, follow driver instructions here
# https://coral.ai/docs/m2/get-started/#2a-on-linux
#     - /dev/dri/renderD128 # for intel hwaccel, needs to be updated for your hardware

    volumes:
      - /etc/localtime:/etc/localtime:ro
      - /srv/dev-disk-by-uuid-03f88bcfa011/dockconfig/frigate/config.yml:/config/config.yml
      - /srv/dev-disk-by-uuid-03f88bcfa011/media/frigate:/media/frigate
      - type: tmpfs # Optional: 1GB of memory, reduces SSD/SD Card wear
        target: /tmp/cache
        tmpfs:
          size: 1000000000
    ports:
      - "5000:5000"

    environment:
      FRIGATE_RTSP_PASSWORD: "password"
set up your cameras
See my page on setting up cameras.
watch a video tutorial
I’ve learned this from others who have published video tutorials. You might see Awesome Open Source or see Mostly Chris. Alternatively see Home Automation Guy (Alan) just below. I prefer Alan’s approach. He uses one server computer to run Frigate and Home Assistant side by side. It’s trickier than using two Raspberry Pi’s but if you’re unfazed by making Docker installations it’s a way to go.
install the Coral.ai TPU software if you use a Coral – optional
- Next install the software for the CORAL.AI USB dongle. I’ve read somewhere that this driver software wasn’t needed – but I went ahead with it anyway. By default you have SSH or terminal access to the Debian Linux that runs behind ‘openmediavault’. Open a terminal window and enter ssh admin@192.168.1.x then enter the password you used when setting up openmediavault. The Coral docs are here but I’ve summarised the command lines you must enter:
sudo apt-get update

echo "deb https://packages.cloud.google.com/apt coral-edgetpu-stable main" | sudo tee /etc/apt/sources.list.d/coral-edgetpu.list

curl https://packages.cloud.google.com/apt/doc/apt-key.gpg | sudo apt-key add -

sudo apt-get update
sudo apt-get install libedgetpu1-std
NOW attach the coral USB accelerator to a USB3 port on the computer. You should be done. If you install the library below you can upload a picture of a bird and it tells you what species it is.
sudo apt-get install python3-pycoral
install the Frigate integration in Home Assistant
When Frigate is running it’s saving clips and events to media/frigate which is a Shared folder you created on the server. You can access these videos using Home Assistant if you install a third-party integration. The process is described here by Home Automation Guy.
install the Frigate automation Blueprint in Home Assistant
It’s time to create an automation which will notify your phone when an event occurs on camera. This is covered in Home Automation Guy Alan’s video above. You can also notify an Android TV to give a pop-up on screen while you’re watching it. The phone needs the Home Assistant app from the app store. The TV needs the Notifications for Android app. When the apps have been installed go to Home Assistant’s integrations list and add the ‘mobile app’ and or the ‘notifications for Android TV/Fire TV’. In so doing Home Assistant acquires two notifiers that you can call. Go to Developer > Services > Notify to test these. BTW the TV notifier also turns on the TV which is a nuisance of sorts.
Here are my settings for this Home Assistant notification. It’s initially fun to receive these messages.

now what?
If you’ve followed the videos hopefully my detail brings the Frigate NVR idea closer to reality. Using Linux and Docker provides a huge gain in capability.
Great write up. I just did the same on my home automation server last weekend. Was going to do a write up on my blog – childof69.co.uk, but you’ve covered it nicely. What are your thoughts on accuracy of detection. I found I had to tweak threshold on each camera based on its location. There or lots of other params to tweak as well, but this seems to be the most effective. Amazed how little CPU is used for the object detection, once a TPU is installed.
Hello Robert and congrats on breaking ground with car telemetry at your https://childof69.co.uk blog. More on this when I catch up.
As for FRIGATE OBJECT DETECTION I am already impressed with what I have gained by using FRIGATE and ditching various (five) camera apps.
The CPU% is around 20%. I’m variously detecting person, car, bicycles, airplanes and cats over numerous cameras.
My object detection is never wrong (ie inaccurate) without reason and the top reason here is foliage being mistaken for a person! My complaint is that sometimes an event doesn’t show the object in the captured footage.
I keenly look at other people’s configurations I’m just taking notes until I feel a need to say, receive alerts on a phone which of course need to be reliable. But yes I think the ‘threshold’ is the thing to tweak first.
So … this is early days for me, it’s a work in progress.
great post