jura coffee machine repairs
… how to service or replace the brewing unit on a Jura coffee machine and many other fixes.
It might be assumed that if you can afford the BMW of coffee machines, you can afford someone who can fix yours. You might instead be someone who likes coffee a lot but you’re keen to avoid those costs. My Jura F90 was bought in 2004, has a mileage of 22,000 cups and surprisingly perhaps, spare parts although rarer, can still be bought to fix it. In many senses it was a good sustainable purchase – after twenty years the cost is £50 / year although I have several times repaired it myself.
So I hope that the following discoveries might save someone the weeks I spent dismantling a Jura coffee machine. It sat in my workshop like a car to be restored. It then had a new ‘brewing unit’ – the engine’ for £100 – which is less than £1200 for a new machine. If I’d understood it better I might have reduced that to £5 for new O ring seals.
this post was first published on my other site in 2013 it had been referred to 20,000 times – or 2500 times a year or 7 times a day
Basics: which is better value, a bean to cup machine or a pod machine?
Short answer: if you drink 6000 cups of coffee (or 3 cups a day for 5 years) the cost of owning either machine is the same. Thereafter using a bean to cup machine instead of a pod machine will cost £150 less per year. My break-even point of 6000 cups of coffee arises from these costs. (I’ve not factored in that the jura machines will require Claris filters and milk cleaner costing say £150 per year. If you’re addicted to coffee that can’t matter can it?).
- A coffee pod machine, such as a Nespresso or Tassimo machine was bought for £70. The coffee pods cost about £0.30p each. Therefore 6000 cups of coffee have cost me £1875. I suspect you’d be lucky to get 6 years use from a £75 pod machine.
- My bean-to-cup machine, such as a Jura F90 cost £900 (add repairs cost £200). The coffee beans cost £10 per kilo and if 15g is used per cup, each coffee costs £0.15. Therefore 6000 cups will cost £2000.
Basics: the cost of ownership is not nothing
If the Jura F90 isn’t a machine you throw away you will have some costs due to accidents, neglect or age. I buy spares from https://juraproducts.uk/spare-parts or ebay.
- Machine new £800
- Replace brew unit £80 – I might have just replaced the ‘O’ ring seals at £5
- Replace cracked water tank £12 – I now use a jug to refill the water tank.
- Replace broken metal frother arm and other small parts £15
- Replace thermoblock, I and F connectors and membrane regulator £67
My Jura coffee selector touch panel is unresponsive or erratic
After dismantling and reassembling my Jura F90 (below), the machine would spring to life at random and make coffees resulting in a mess on the counter. The touch screen was unresponsive at times. This may have been a problem I caused but now it’s fixed. The touch-screen coffee selector works better when cleaned and left to dry. A German forum post suggested that steam can get behind the touch panel and it recommended that you put plastic film (or card or shirt collar packing film) horizontally beneath the touch panel and so isolate it from the steam from the coffee dispensing area. This has worked well for me since.
Coffee bean grinder problems: the grinder can be serviced easily
You don’t have to take the grinder to pieces to service it. Some youtube videos show you the entire dismantling but that may be unnecessary if you just want it cleaned up like new. On the Jura F90 you’ll need to remove the top panel (see first section of dismantling below). You’ll see the coffee bean hopper held in place by two vertical screws. Approach them gently with a torx screwdriver bit else you’ll break the screw’s fixing point.
Note the position of the consumer grinding adjuster as you obviously want to replace everything as it was. Hoover excess beans. Lift the hopper clear of the body. Clean the central silicone seal. Note the position of the big outer cog wheel which is the grinder adjuster. Turn this anticlockwise and you’ll be able to remove the outer grinder wheel and do some more cleaning up. If you just want to clean up, don’t loosen the central grinding wheel. Instead see this video, where the Saeco (another brand) has a similar grinder. As I said earlier, don’t over tighten the two torx hopper screws after reassembling.
https://www.youtube.com/watch?v=5M5WmOYzTAU
Plumbing problems: the Jura F90 coffee machine is leaking
My Jura F90 machine leaked and messed up the wood worktop beneath it. Most of this water damage was due to emptying the grounds and regular removal of a full drip tray. But there were other reasons.
- There was a leak from the internal plumbing.
- There was a leak from the brewing unit (see Malfunction 8 below)
Inside the unit various teflon tubes transport water from place to place so if you suspect the internal plumbing there’s some dismantling to do. A section below explains how to remove the side panel on the coffee grinder side to access the pump and tubes. The tubes are teflon/plastic and held in place by a wire clip. Scale around a connection might suggest a leak. Remove a wire clip and withdraw the tube and its brass collar. Inside the connection there’s a tiny ‘o’ ring seal. You can replace or re-seat this ‘o’ ring. Some ‘o’ rings (in a spares kit) are the same size but e.g. intended for high temperatures. Push the teflon tube and its collar back in firmly and lock it with the wire clip.
After 11 years and 16,000 cups the leaking from my 2004 Jura F90 was getting serious. I contacted UK Jura spares (below) to replace the ‘o’ rings in numerous connections. These are all below the coffee grinder unit. I tried to remove and renew the connections to the thermoblock (heater) but they were so corroded that the heater also needed replacement. Overall the heater and new Teflon connectors cost £67 but nothing leaks anymore. I also replaced the membrane regulator unit (after the pump at the front bottom of the machine) which I heard is notorious for leaking. The parts I bought had been modified from the originals on the machine but the Jura spares dept helpfully provided what I needed.
Basics: using the Jura Impressa F90 daily
This model sits in the middle of the Jura range. The middle of the Jura range compares to the top of everyone else’s ranges! The F90 has a single water heater which means that it can make coffee or steam but not both at the same time. This isn’t much of an inconvenience. The machine appears to know when it needs a clean; descale or the grounds need to be emptied. What you experience is not entirely spoofed intelligence and it works well.
- The ‘Empty grounds’; ‘Descale’ and Clean machine’ messages derive from counters which guess the needs.
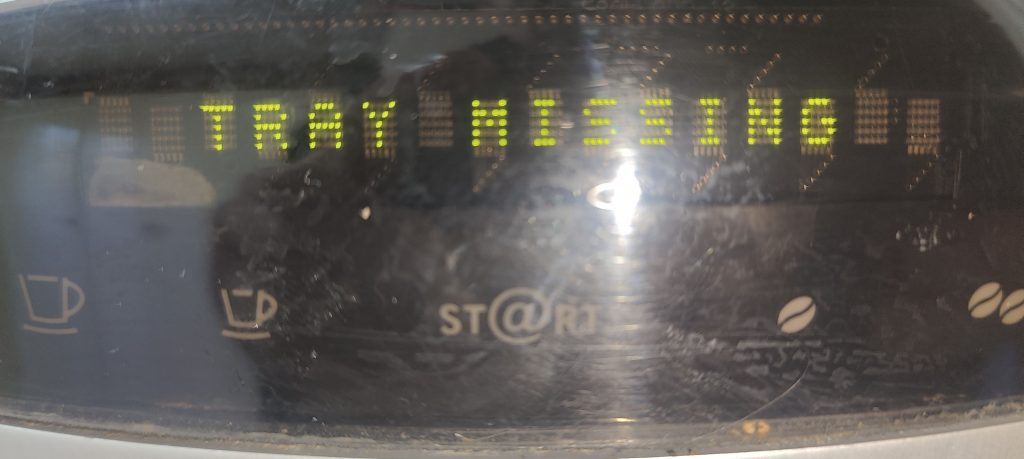
- The ‘Tray Missing’ message comes from a microswitch.
- The ‘Fill Beans’ message appears if no coffee powder arrives in the brewing unit – the sensor is probably in the grinder but it’s a mystery.
- The ‘Fill water’ message is triggered by a microswitch facing the tank and/or a sensor in the plumbing.
When you see the message ‘Clean machine’ you respond by holding the Maint. button until what to do appears on the display. The machine cleaning cycle cleans the brewing unit and coffee outlet only.
When you see the message ‘Machine Scaled’ you respond by removing the water tank and turning on the machine by holding the Maint. button. What you must do to descale the machine appears on the display. I use all sorts of kettle scalers. The descaling cycle cleans the boiler; pump; valve; steam nozzle and probably the inlet nozzle at the bottom of the brewing unit. I never use a Claris filter since our water is chlorine-free.
Problem: Jura coffee machine brewing unit Malfunction 8
The brewing unit (= brewing group – Brüheinheit) collects the ground coffee; infuses it with water and ejects a plug of used grounds. A number of different brands are made by one Swiss firm. The brewing unit is almost identical on around 50 different Jura; Krups and AEG coffee machines. In other words, the guts of all these machines is often similar. The attachment places are similar; the electronic garnishing (display; control programme and buttons) will differ.
One reason to service the brewing unit comes from a Malfunction 8 message. The message occurs when the brewing unit fails to achieve the correct state, perhaps when you switch it on. The encoder (an optical rotation sensor) monitors the position of the brewing unit. Malfunction 8 may be accompanied by straining noises. A reason is that the motor might be straining is stiffness in the brewing unit mechanism. This can be due to a damaged O-ring or a plug of coffee. This Malfunction 8 error can go away on its own. You can clean the parts you can see without removing and dismantling the brewing unit. You may be able to reach into the machine to dislodge some grounds. To do this unplug the machine when the brewing mechanism is at the top of its travel and reach in from below. A dentist’s mirror would be handy here. Do not indiscriminately squirt cleaning liquids inside as this can get into the wrong normally dry places. Instead use a toothbrush; dry it and then vacuum.
The encoding unit could also be at fault. This isn’t too expensive and is easy enough to replace.
What can go wrong in the Jura brewing unit?
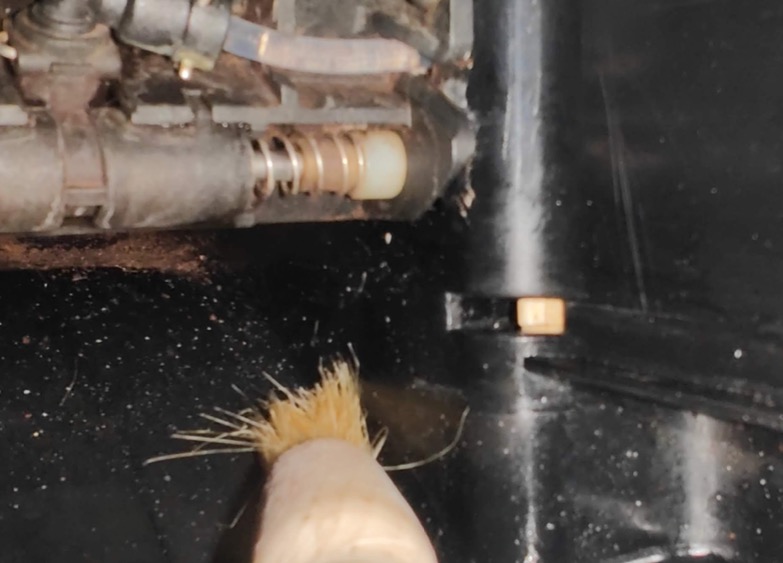
My machine had delivered 10,500 cups over five years and was now leaking half a cup of coffee into the grounds dump bin. This implied a worn seal (O-ring) somewhere. The simplest cause of a leak would be a worn O-ring on the chamber water inlet nozzle at the bottom of the brewing unit. Look into the lower parts of the machine and you’ll see a water pipe coming in from the side; behind it a nozzle points upwards. This nozzle can be seen and almost reached when the mechanism is at the top of its travel. Other causes of a leak could be the two large O-rings inside the brewing unit and this requires a lot of dismantling. With experience you might be able to replace the inlet O-ring in situ (but you might need to dismantle the thing to get the experience in the first place).
opening a Jura coffee machine
I’d recommend watching the youtube video showing the dismantling process – eg see Partsguru at https://www.youtube.com/user/PartsGuruUSA. The full monty dismantle is no one-day process but taking off the top and a side of a Jura enables several repairs. Over the years I broke several of the tabs by not knowing the process. The Jura guarantee is 25 months btw.
Empty and or vacuum out the beans; remove the water tank and the waste trays. You will need a few Torx drivers and a unique screwdriver or pliers to remove the oval opening screws at the back. A pry tool used for mobile phones will help where plastic lugs hold on the side and top panels. On the Jura F90 you can use pliers to undo two oval headed screws at the back. If you mash them up you can replace them with regular screws. You’ll be able to remove the top panel after removing two more screws on the top surface and using a pry tool to disconnect two lugs at the front edge.You don’t want to dismantle the coffee grinder and its hopper. Retain the hopper’s rubber seals or glue them in place before you lose them. Four screws hold the central back body panel and side panels. The side panels are removed by using a pry tool to release lugs all down the edge where these panels meet the front. Work slowly to slide/manoeuvre the side panels backwards.
If you simply want to clean the brewing unit externally then just remove the panel on the water side. Find the water inlet just where the water tank sits. A screw here allows you to remove its plastic holder – but take a photo of how it slots in. This gives access to the lower end of the brewing unit. If the plastic piece is still it the way, you can ease off the water pipe from the water inlet and put it aside.
The brewing unit exposed
The machine is partly operable with the sides and water tank removed. Cover exposed electrical connections and remind yourself of the danger. Thus you can switch off the power when the brewing unit’s white gear is at the top and then at the bottom. In this way you will get access to places causing any jam. You might just need to clear the inner chamber and path for two plungers with two large O-rings. You can see the water inlet nozzle with its o-ring which can perish and cause coffee or water to go to waste. Silicone grease only where the O-rings slide. Leave the other plastic parts ungreased. You can buy a maintenance kit or a new brewing unit from the shop below.You will want to avoid removing the nylon water pipes unless they’re actually leaking. These pipes are held in place with a wire clip (remove with a flat head screwdriver). Ease the nylon pipe with its brass collar out of its socket. The pipe goes into an O-ring in the pipe’s socket – this might fall out. These O-rings are a likely causes of leaks.
Removing the brewing unit from a Jura coffee machine
You could dismantle the brewing unit; dish wash all the parts and replace and grease the O-rings. It’s a big job to reassemble it so I say try not to disassemble the brewing unit and instead use brushes to clean it. You can remove the unit and buy a new/used brewing unit for £100. The brewing unit is common to many makes. The attachments to the brewing unit are different however. eg The coffee delivery nozzle at the top of the new brewing unit may be different but you can swap in the old top end cap and discard to part on the new unit.
Removing the brewing is also lengthy job – akin to a removing a car engine. There is no need to force anything. When you’re inside the Jura F90, the brewing unit is removed by undoing two obscure screws from the coffee grinder side. I had difficulty removing these and I wish I had taken time to find the right tool instead of wearing down a screw head. In the electronics section there’s an optosensor (encoder) unit held in place with a steel clip. You remove this to access two screws that remove the motor. (I once replaced my encoder for no good reason). At the bottom of the brewing unit, the water inlet valve is fixed to the machine with a single screw. Next, on the water tank side, you’ll see two lines of screws that hold the assembly in place. The middle screws of the screws allow you to separate the unit from the gear. The top two holes don’t have screws.
Cleaning is all – do that
It is not rocket science to clean the machine yourself. Before vacuuming it check for loose parts or screws! Wipe and toothbrush whatever you can see. Don’t wet excessively, but a cloth damped with descaling liquids can work wonders. Do rinse the acid off any metal parts when clean. At some point the machine will need a really good clean and dismantling so I do all I can to remove the coffee debris that finds its way into any gap. Indeed I wonder if anyone’s paid for a professional clean and wondered if a new machine was a better idea.
Fill your Jura water tank from a jug
I’ve replaced my water tank twice over 22,000 cups. The tank can be cracked by handling or its exit valve can stick or break. For longevity, and ease actually, I fill the tank from a jug. The tanks, which may be common to several models, used to be widely available and cost £12. But the second replacement cost £30 secondhand on ebay. One spare parts retailer was asking £100 for a new water tank hence I’ll repeat: use a jug.
Empty grounds message does not go away – due to stuck tray switch
You’ll often see an ‘Empty grounds’ when the lower water tray and the grounds box may need emptying. As I understand it, the Jura coffee machine counts the number of coffees made since you last pulled out the tray. The machine expects that you’ll remove the tray for several moments to do so. However, after emptying the tray, my Jura F90 continued to show ‘Empty Grounds’ and no amount of tray removal or turning off and on could change that. What happened was that the tray switch was ‘stuck in’ so that the machine ‘thought’ I”d never removed the tray. This was easily solved by brushing the switch area with isopropyl alcohol such that the switch could move freely. I used a pastry brush. On other models the moving switch is replaced by electrical contacts which may deserve a clean.
In a worst case I would have opened up the Jura to access the switch to clean or replace it – but that’s for the future.
spare parts help
When I wrote this, coffee machine spare part supplies were not as common in the UK as they were in mainland Europe. You can buy spares from the UK jura people – I took a photo of what I needed and everything went extremely well hereon. While the Jura spares web doesn’t list every screw you might need, send them a mail and hopefully you’ll be as impressed as I was: https://juraproducts.uk/spare-parts
Overall you can buy a complete brewing unit; a pack of O-rings and grease; encoder; water inlet; water pipes. They also sell replacement water tanks; pump; solenoid; valve; grinding wheels; grinder unit; heater. But with my 2004 Jura now 22,000 cups old the official shop may itself have run out of several spares. You may still be able to find what you need as the innards of these machines can remain the same even though the outer parts change more frequently. For example, I replaced a second hand water tank for £20 several years after I replaced the original tank for £12 from the official parts shop. One spare parts retailer was asking nearly £100 for a new water tank.
You can compare prices with a German coffee machine spares shop at www.kaffeemaschinendoctor.de Their postage policy at £15 a time is ridiculous for small items but typical of my buying experiences from Germany. The upside is that the site has pictorial guides and help forums to dismantle the Jura that Google will translate. Another site Juradoctor.de also carry lots of spares but don’t seem to ship to my country.
More help:
In the USA Partsguru have a shop with excellent help on Youtube https://www.youtube.com/user/PartsGuruUSA